Zuk on 38's

Got an vehicle build underway? post up pictures and tell us all how its going!

Builds threads only please.
User avatar
TanZuk
Engaged 4wd low
Engaged 4wd low
Posts: 234
Joined: Thu Jan 05, 2012 11:17 pm
Location: Pompano Beach, Florida US

Re: Zuk on 38's

Post by TanZuk » Thu Sep 19, 2013 6:58 pm

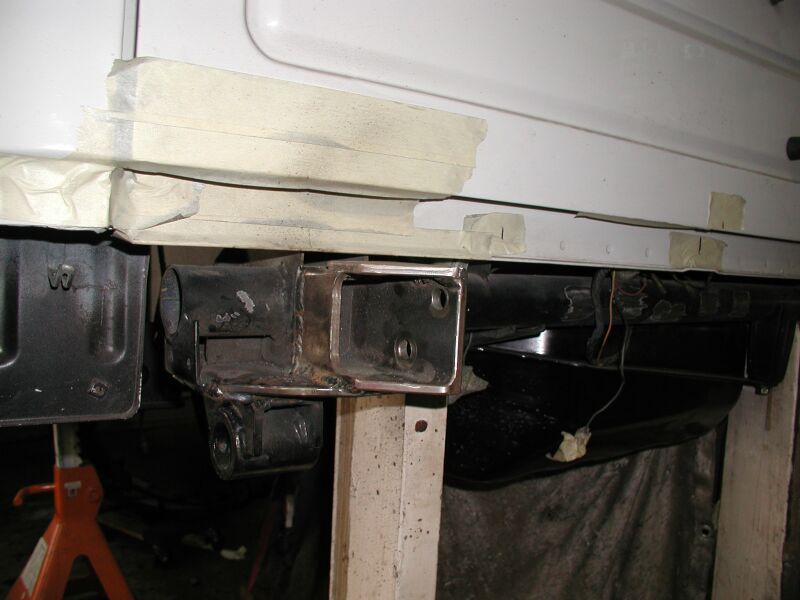
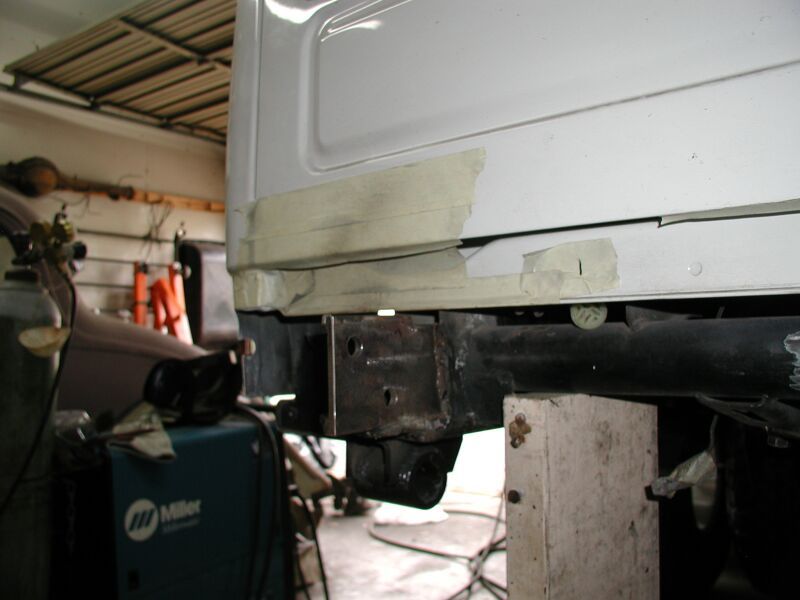
Since the rear end components were out for painting. This seemed to be a good time to get some ideas for a rear bumper. The usual mounting holes that seem to be used to secure the rear bumper were not available, since the rear shackles were moved back.


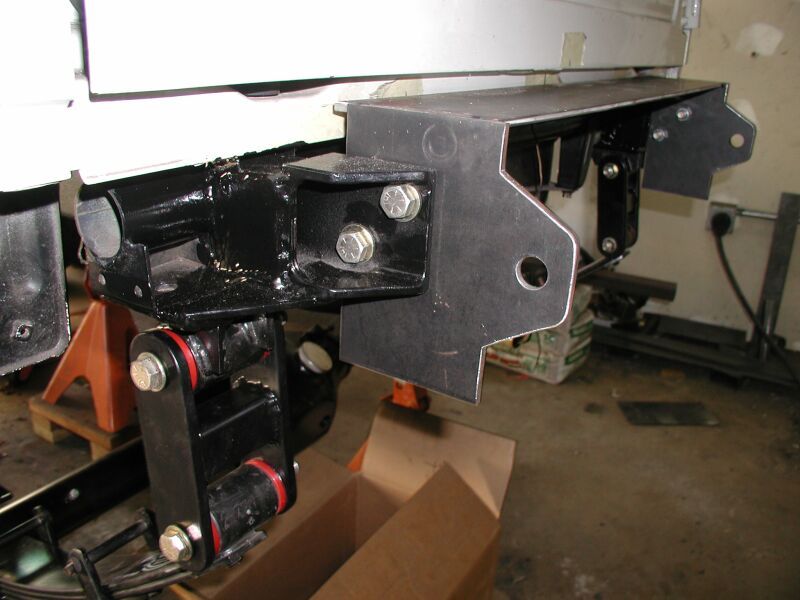
Here was my solution for this problem of mounts for the rear bumper. Used 1/4x2x3” rec tube and milled the sides down to slide fit in the Zuk frame. This was done to sleeve the inside of the Zuk rails and make for a stronger joint and alignment for welding. There was also a piece of ¼” welded to the under side of the mount and the rear shackle for side strength.
Image


Image


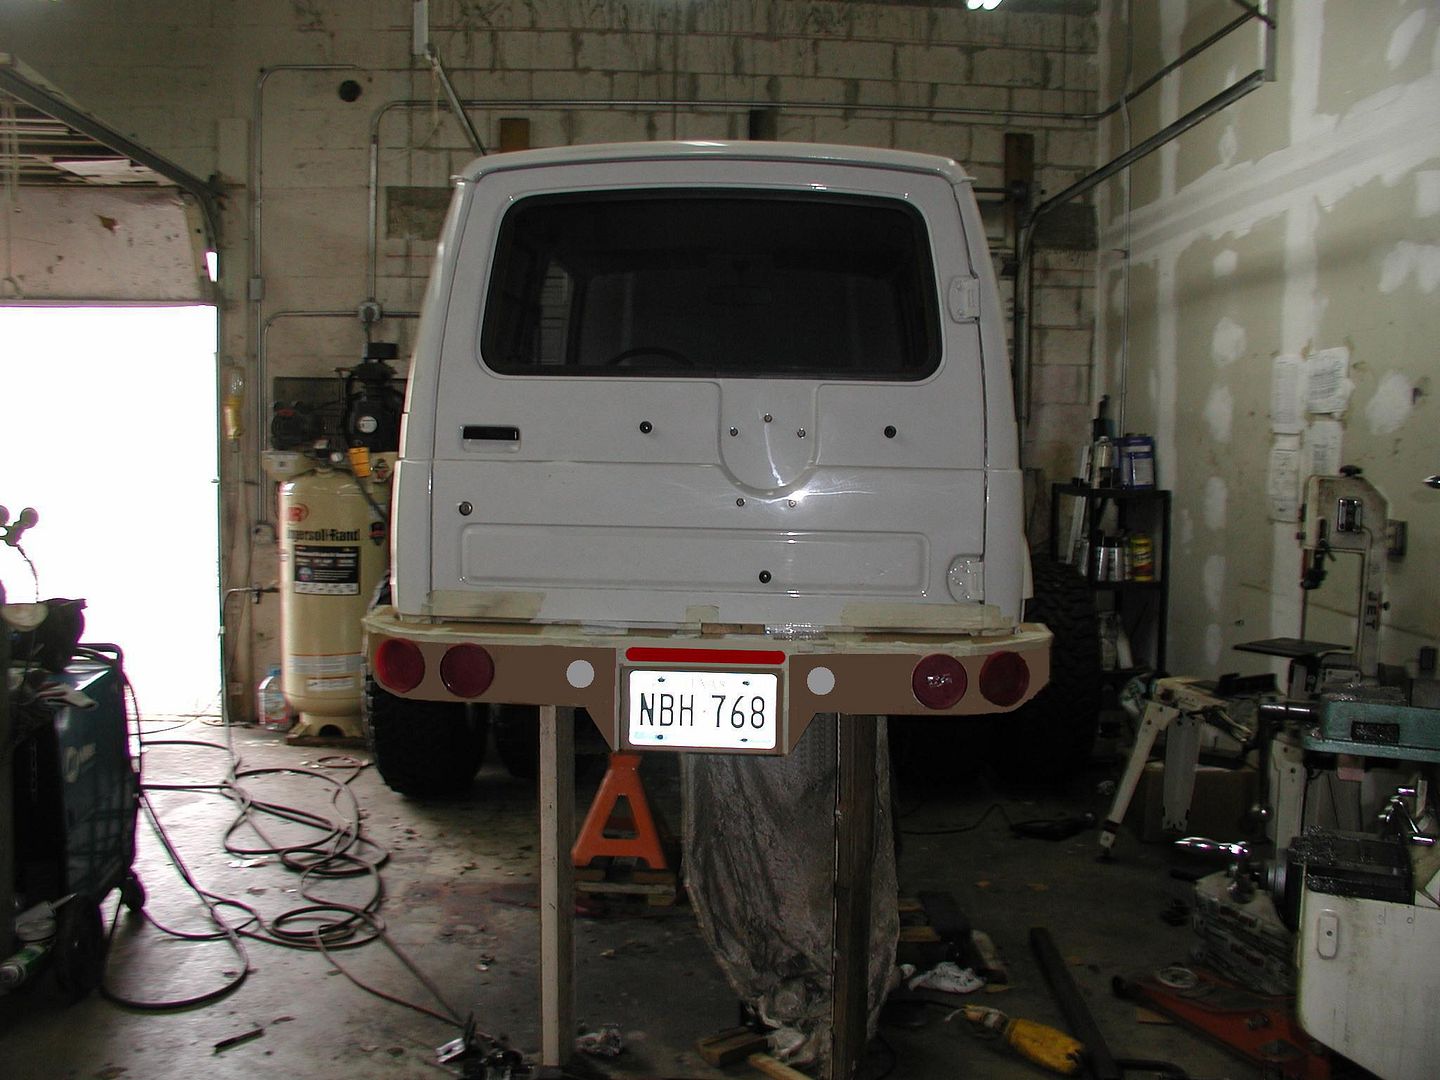
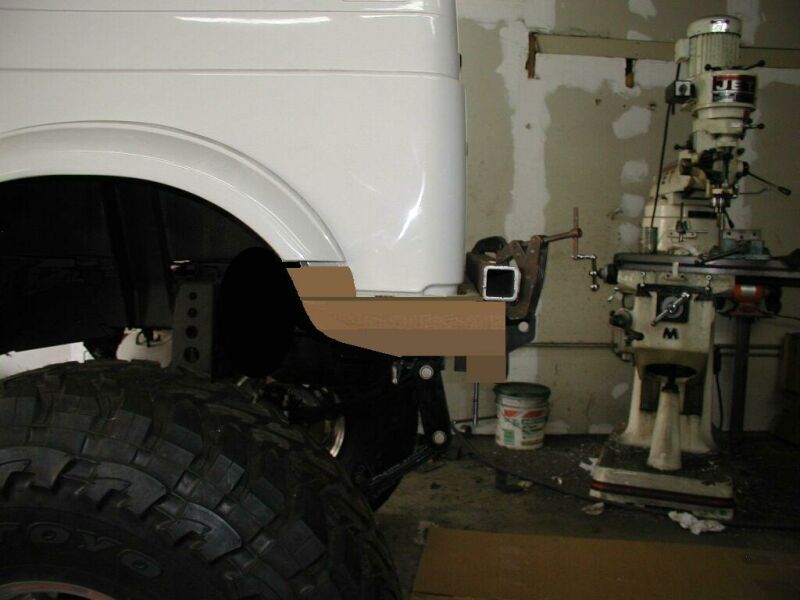
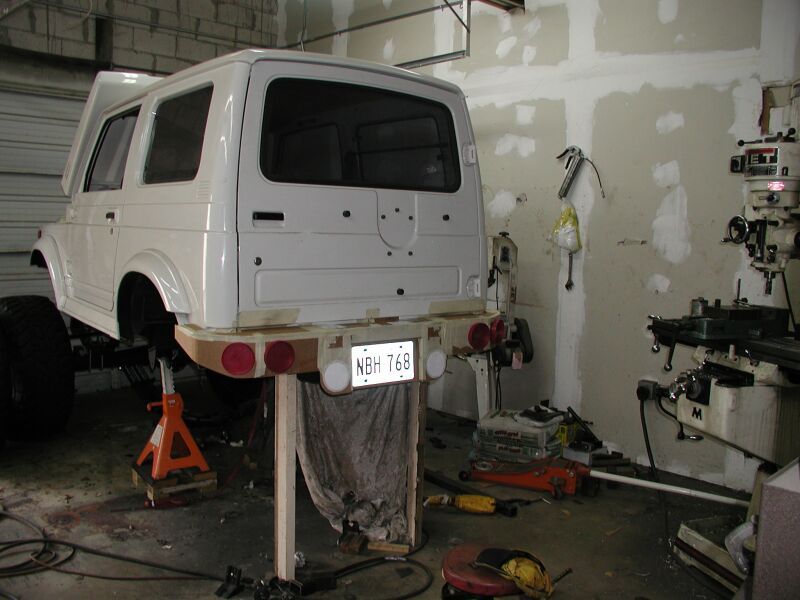
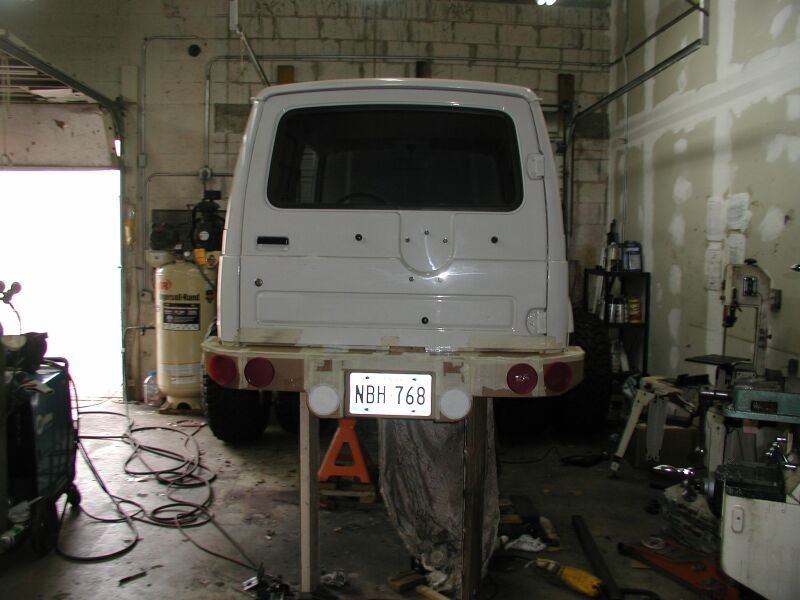
Here is my cardboard mock up and is a bit lager then most of the rear bumpers that are being made. Also wanted to use the round lights and they are 4 1/2” diameter. The reasoning behind this is that the Rig will see more street then trail and didn’t want anyone having a direct hit to the fuel tank. There will also be a removable step for rear entry for a single passenger, since there will only be a solo seat in the rear. Most important, doesn’t look like everyone else’s.
Image


Image

Should be installing the rear end this weekend and ordering material on Monday for the bumper.

User avatar
TanZuk
Engaged 4wd low
Engaged 4wd low
Posts: 234
Joined: Thu Jan 05, 2012 11:17 pm
Location: Pompano Beach, Florida US

Re: Zuk on 38's

Post by TanZuk » Thu Sep 19, 2013 6:59 pm

Tweaking the rear bumper design.

This is a good example of using expendable materials when coming up with an idea for what you want to fab.

Decided to look at this bumper for a week to try and fine tune it a bit and make it a little easier to fab. The large radius were eliminated and angle plates will be substituted. There was also and addition of a center brake light bar and the 4” backup lights were changed to the 2”. Also fish plated and painted the bumper extensions.

Ordered up the metal and lights yesterday. Going to finish up painting a few more parts on the rear suspension and install it. This will get everything in one place to get ready for the projected storm for next week.


New Design

Image\


Old Design

Image

User avatar
TanZuk
Engaged 4wd low
Engaged 4wd low
Posts: 234
Joined: Thu Jan 05, 2012 11:17 pm
Location: Pompano Beach, Florida US

Re: Zuk on 38's

Post by TanZuk » Thu Sep 19, 2013 6:59 pm

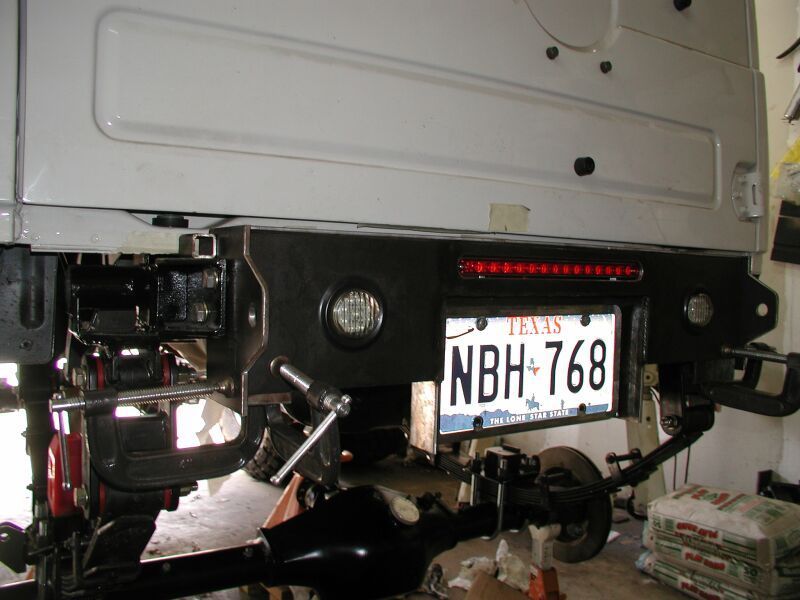
The rear axle is back in place to make some much needed working room. The construct of the pieces will be done on the Rig. This will be the welding jig to ensure proper fitment.

The license plate will be recessed along with the top brake light bar. This will keep them safe from an accidental hit when loading up of a rear passenger.

Here are a few pics of the start and the lights that will be used.


Image


Image


Image

User avatar
TanZuk
Engaged 4wd low
Engaged 4wd low
Posts: 234
Joined: Thu Jan 05, 2012 11:17 pm
Location: Pompano Beach, Florida US

Re: Zuk on 38's

Post by TanZuk » Thu Sep 19, 2013 7:00 pm

Got the center section machined out for the backup lights, recessed brake light bar and recessed license plate. The license plate recess has been made and welded to the center section. Need to order some more material for the outer pieces.


Image

User avatar
TanZuk
Engaged 4wd low
Engaged 4wd low
Posts: 234
Joined: Thu Jan 05, 2012 11:17 pm
Location: Pompano Beach, Florida US

Re: Zuk on 38's

Post by TanZuk » Thu Sep 19, 2013 7:00 pm

Got the center section of the rear bumper all welded up inside and out. The outside welds were smoothed out and radiuses were added to the outer portions.

Struggled a bit coming up with a good design for the outer wings. After a few tries with the cardboard and the computer this is what it ended up looking like.

Image


Decided to post a couple of pics of what goes into machining the plates. There are also some captions to explain what will be done for a finished product.


Image


Image


Image


Image

User avatar
TanZuk
Engaged 4wd low
Engaged 4wd low
Posts: 234
Joined: Thu Jan 05, 2012 11:17 pm
Location: Pompano Beach, Florida US

Re: Zuk on 38's

Post by TanZuk » Thu Sep 19, 2013 7:01 pm

As usual this bumper is also taking much longer to complete then anticipated. Did I mention it is getting extremely hot in the shop now. smokin

Still had some issues with the wings. Ended up resigning them a few more times to try and get a better transition line from the wheel flare to the 6.5” bumper end, without looking so awkward.

Here is what it ended up like and is tacked in place. There are 2 angles leaning towards the body. The top angle is 18* and the lower is 28*. This helps with tire clearance when suspension is compressed.

Image


Here is the DS with the lights in to give you an idea what it will look like.

Image

User avatar
TanZuk
Engaged 4wd low
Engaged 4wd low
Posts: 234
Joined: Thu Jan 05, 2012 11:17 pm
Location: Pompano Beach, Florida US

Re: Zuk on 38's

Post by TanZuk » Thu Sep 19, 2013 7:05 pm

That's all I have got done to date. The rear bumper has had all the outer welds smoothed out and rounded all the edges. This bumper now looks like all the metal was bent instead of welded.

Going to send the bumper out to get LineX bed coating and tinted to match the rig.

Terry
Last edited by TanZuk on Thu Sep 19, 2013 7:45 pm, edited 2 times in total.

User avatar
dan_2k_uk
I spend far too much time on here
Posts: 4924
Joined: Tue May 06, 2008 5:19 pm
Location: Swindon, Wiltshire

Re: Zuk on 38's

Post by dan_2k_uk » Thu Sep 19, 2013 7:26 pm

Tidy as always.

How are you planning on getting into it? :D
Image
Janspeed manifold, LWB Vit vented discs and calipers

Build thread -- Build photos -- HLA-Artwork
Coming soon: YJs, Trussed axles, Full float rear.

User avatar
TanZuk
Engaged 4wd low
Engaged 4wd low
Posts: 234
Joined: Thu Jan 05, 2012 11:17 pm
Location: Pompano Beach, Florida US

Re: Zuk on 38's

Post by TanZuk » Thu Sep 19, 2013 7:43 pm

dan_2k_uk wrote:Tidy as always.

How are you planning on getting into it? :D

Thanks Dan,

This was part of my planning stage of the build. The most important was to take measurements of the shop door to make sure I could get it out. Next was how to get in since I’m no longer anywhere near 20ty any more.

That was the reason for the running boards.

I use the back tire for the 1st step to the running board and then in the door. Really not that bad. The back door passenger will have a removable 3 step bar that will attach to the back side of the bumper like a receiver hitch mount. Still in the planning stages.

Terry

User avatar
donkeychomp
I spend far too much time on here
Posts: 3582
Joined: Thu Aug 18, 2011 3:49 pm
Location: Shepperton, Middx

Re: Zuk on 38's

Post by donkeychomp » Thu Sep 19, 2013 10:30 pm

Terry welcome back matey! Wondered what had become of you.

Love the work, as usual all top notch stuff.

Alex

ps interesting tag for a FLA anus!
If it ticks over...leave it

Post Reply