Restoring a SJ van body.
- Jordi
- Bow down before me

- Posts: 7535
- Joined: Sun Nov 29, 2009 2:35 pm
- Location: Darlington, Co. Durham
Re: Restoring a SJ van body.
I'm doing a similar project. Bought a tin top to salvage the body off. Going to modify and repair it then swap it onto my chassis.
http://forum.suzukiclubuk.co.uk/vi ... =10&t=9397
http://forum.suzukiclubuk.co.uk/vi ... =10&t=9397
1988 Samurai - Truck Cab & Tray Back - 1.6 8v & HIF44 - Snorkel - Stack Exhaust - PAS, YJs & 33s - Trussed, Gusseted & Pumpkin Capped Axles - 4.3 R&Ps - 4.16 T/Box - Rear Air Locker - Full Float Back Axle & Discs - RCV Front Shafts - X-Eng Handbrake - Custom Fuel Tank
- HuwJones
- Engaged 4wd low

- Posts: 126
- Joined: Fri Mar 01, 2013 6:43 pm
- Location: Knee deep in shit usually.
Re: Restoring a SJ van body.
I thought I'd mention some of the things I'm planning on doing to the SJ in the next few months.
On the chassis:
1) New Fuel Lines
2) New Brake Lines
3) Waxoil patches of chassis where the Waxoil has fallen off.
4) New Handbrake shoes.
5) New UJs in Props.
On the body:
6) Patch rust in sills and arches
7) Remove dents on passenger sides
8) Repair rust around rear door hinge.
9) Paint with Furtan and repaint Nato Green
9) Add Voltmeter and Clock to dashboard
10) Add more speakers to back
11) Aluminium floor cover.
12) "Expedition" style roof rack, made from aluminium.
13) 4 light, Light bar on front. Single light pointing back.
13) New / refurbish current bucket seats.
And other stuff that need doing, when I have time/funds
14) Speedo cable
15) New white dial faces with blue backlight
16) LEDs in dashboard (Might as well replace all of them if they're 10 for £3.99 and three on the dash are bust!
17) 'Heavy Duty' bumpers
There are loads of other little jobs need doing, but they are the ones I will concentrate on for now.
Huw
There's three ways of doing things,
1) The Right Way,
2) The Wrong Way
3) My Way.
2 & 3 are usually the same.
1) The Right Way,
2) The Wrong Way
3) My Way.
2 & 3 are usually the same.
- HuwJones
- Engaged 4wd low

- Posts: 126
- Joined: Fri Mar 01, 2013 6:43 pm
- Location: Knee deep in shit usually.
Re: Restoring a SJ van body.
D-Day! (Well, it was supposed to be!) I picked up the trailer from a co-worker, a nice 6ft by 10ft. Original plan was for me to drive the 80 ish mile round trip to pick up the SJ in my current SJ. But it struggled to move the trailer on it's own, let alone with another car on it.
So I asked my dad if he was busy and he said that he wasn't, Brilliant I thought, He's got a 2.8 LWB Pajero rather than my 970cc SJ, that's the perfect machine for the job.
So, we drove over to where I stored the trailer overnight in the Pajero, connected it up and drove off. Got to the gate, I got out to lock it, and noticed that none of the lights worked. We played about with the trailer and the Pajero, still nothing.
I went to get my SJ to see if the trailer still worked, and it worked perfectly. I brought a tow board with me to use on the trailer as a last resort. It was just my luck that the trailer was about 13ft long, and the cable was only 12 1/2ft long.
At the end of the day I came up with three conclusions.
1) I need a longer trailer board wire.
2) The Pajero is fucked. (known already, it won't pass another MOT)
3) There's little wonder why the Spanish word 'Pajero' means wanker...
On the bright side, it also gives me time to figure out how to get it into the garage. Which leads to my question.
Does anyone know someone in North Wales that would have a SJ rear axle I could borrow for a day or buy dirt cheap? It'll help a lot to get it into the garage as the one I'm buying only has a front axle.
Thanks
Huw
So I asked my dad if he was busy and he said that he wasn't,
So, we drove over to where I stored the trailer overnight in the Pajero, connected it up and drove off. Got to the gate, I got out to lock it, and noticed that none of the lights worked. We played about with the trailer and the Pajero, still nothing.
I went to get my SJ to see if the trailer still worked, and it worked perfectly. I brought a tow board with me to use on the trailer as a last resort. It was just my luck that the trailer was about 13ft long, and the cable was only 12 1/2ft long.
At the end of the day I came up with three conclusions.
1) I need a longer trailer board wire.
2) The Pajero is fucked. (known already, it won't pass another MOT)
3) There's little wonder why the Spanish word 'Pajero' means wanker...
On the bright side, it also gives me time to figure out how to get it into the garage. Which leads to my question.
Does anyone know someone in North Wales that would have a SJ rear axle I could borrow for a day or buy dirt cheap? It'll help a lot to get it into the garage as the one I'm buying only has a front axle.
Thanks
Huw
There's three ways of doing things,
1) The Right Way,
2) The Wrong Way
3) My Way.
2 & 3 are usually the same.
1) The Right Way,
2) The Wrong Way
3) My Way.
2 & 3 are usually the same.
- HuwJones
- Engaged 4wd low

- Posts: 126
- Joined: Fri Mar 01, 2013 6:43 pm
- Location: Knee deep in shit usually.
Re: Restoring a SJ van body.
Not much to report. I've bought a SJ rear door. That's about it really! I'll start to get that into decent condition whilst I wait for the car. I'll be phoning my dad's friend tomorrow that says he could go get it for me (he owns a garage and has the proper trolleys etc. to move wheel-less cars.
I've found one good thing about the Pajero. It's given me inspiration about where I could put the Toolbox in the SJ! More on this in the future.
Now then... let's see if I can take this glass out without braking it!
Huw
I've found one good thing about the Pajero. It's given me inspiration about where I could put the Toolbox in the SJ! More on this in the future.
Now then... let's see if I can take this glass out without braking it!
Huw
There's three ways of doing things,
1) The Right Way,
2) The Wrong Way
3) My Way.
2 & 3 are usually the same.
1) The Right Way,
2) The Wrong Way
3) My Way.
2 & 3 are usually the same.
- HuwJones
- Engaged 4wd low

- Posts: 126
- Joined: Fri Mar 01, 2013 6:43 pm
- Location: Knee deep in shit usually.
Re: Restoring a SJ van body.
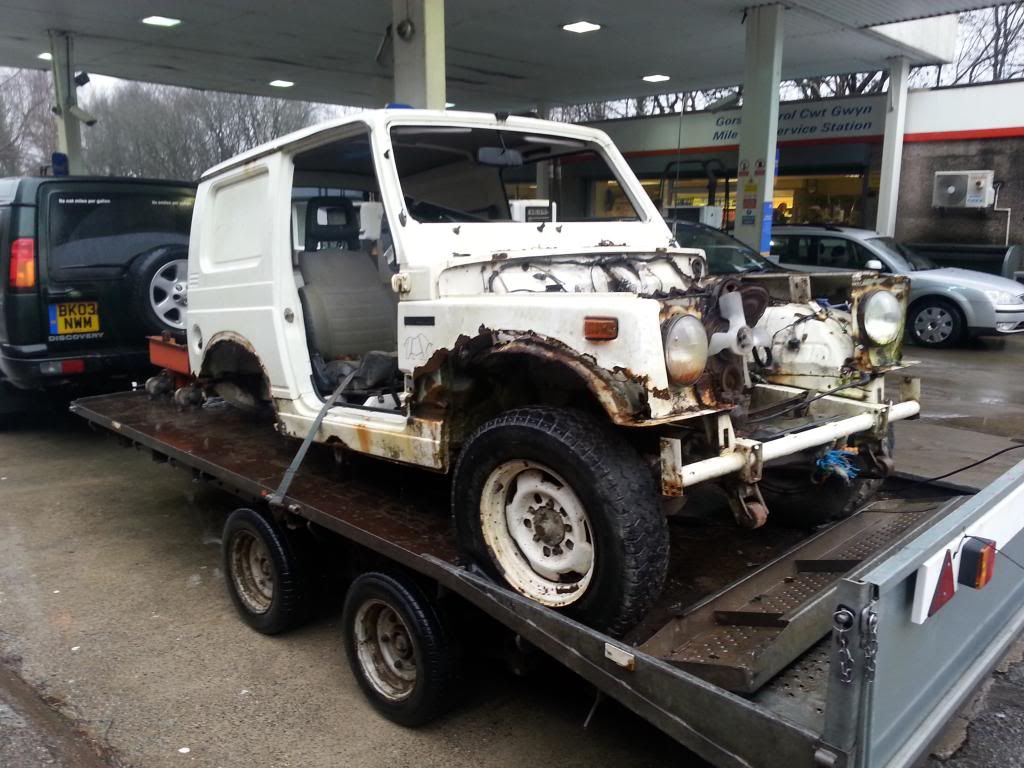
Today was the D-day Mk2, and it went quite successfully. My dad's friend took his trailer down with his Automatic, V8 Discovery. No problems at all. picked it up with a JCB, put it on the trailer then spent a hour looking at some Mk1 Fiesta, Escorts, Sierra Cosworths and a few other quite nice looking old cars.
Gave him the £100 and set off. I wanted to stop at the local Suzuki Dealership to pick up a new speedo cable, but unfortunately what they ordered wasn't the type that I needed. Once I got home, the SJ was unleaded successfully and chucked in the garage.
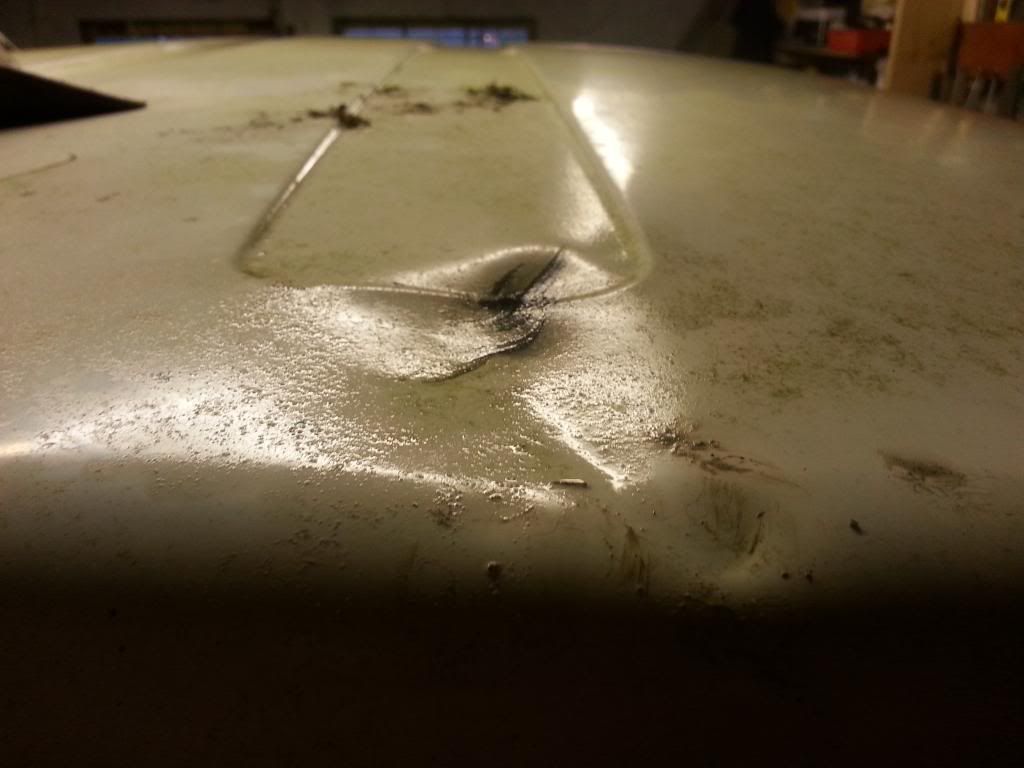
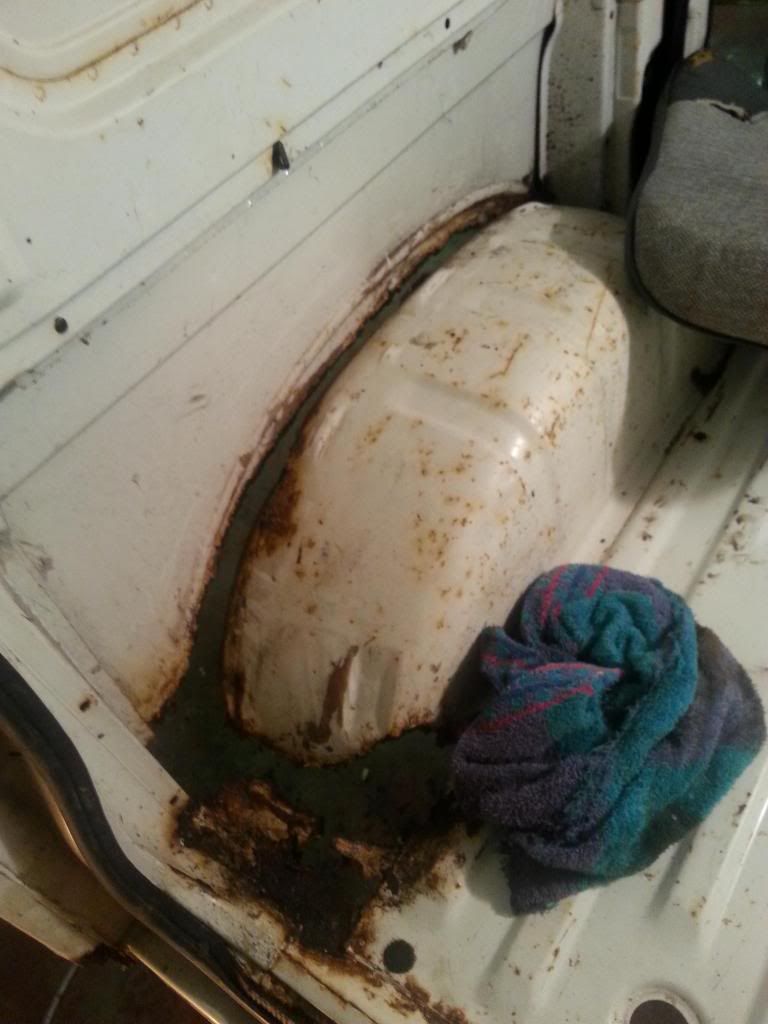
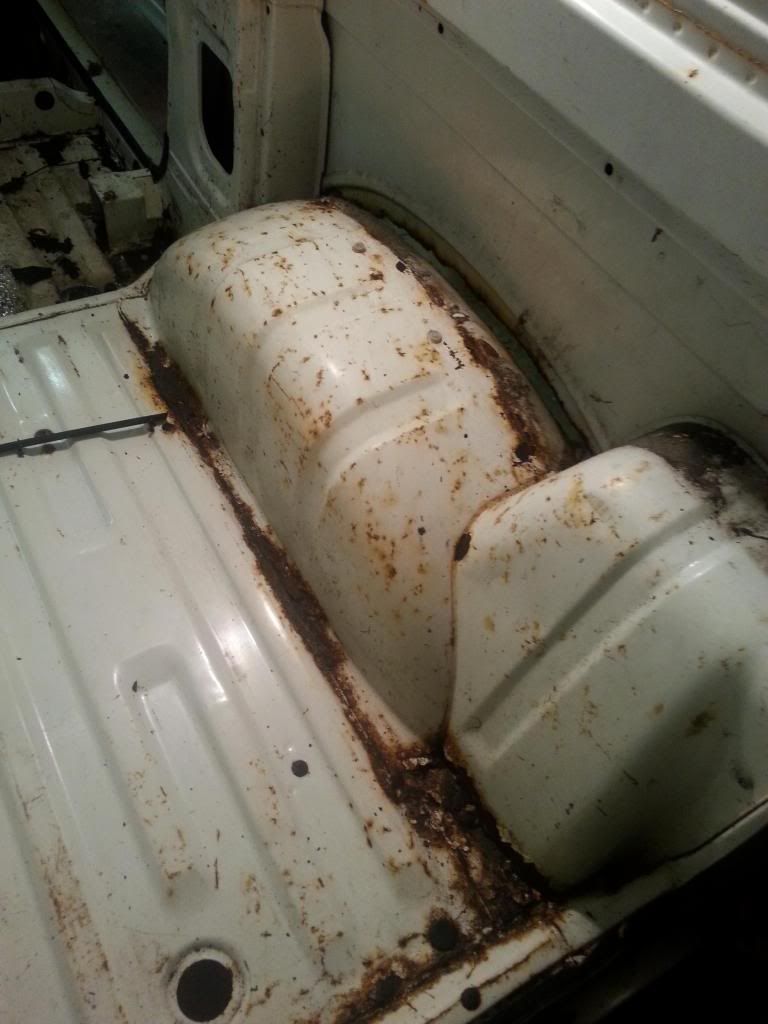
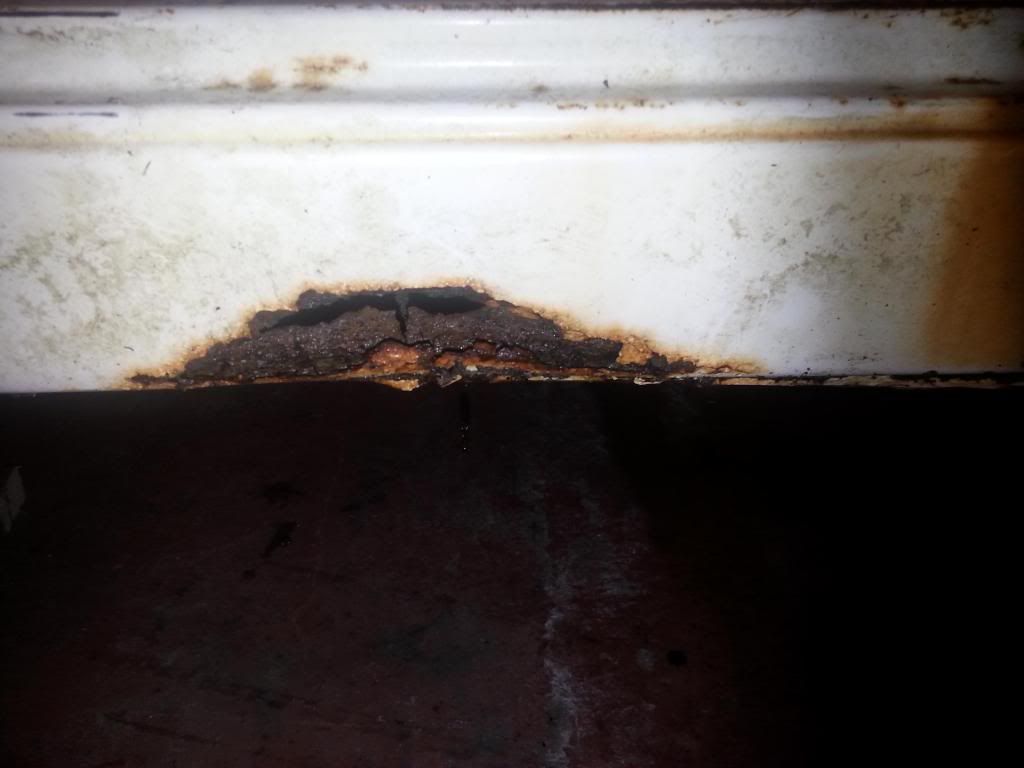
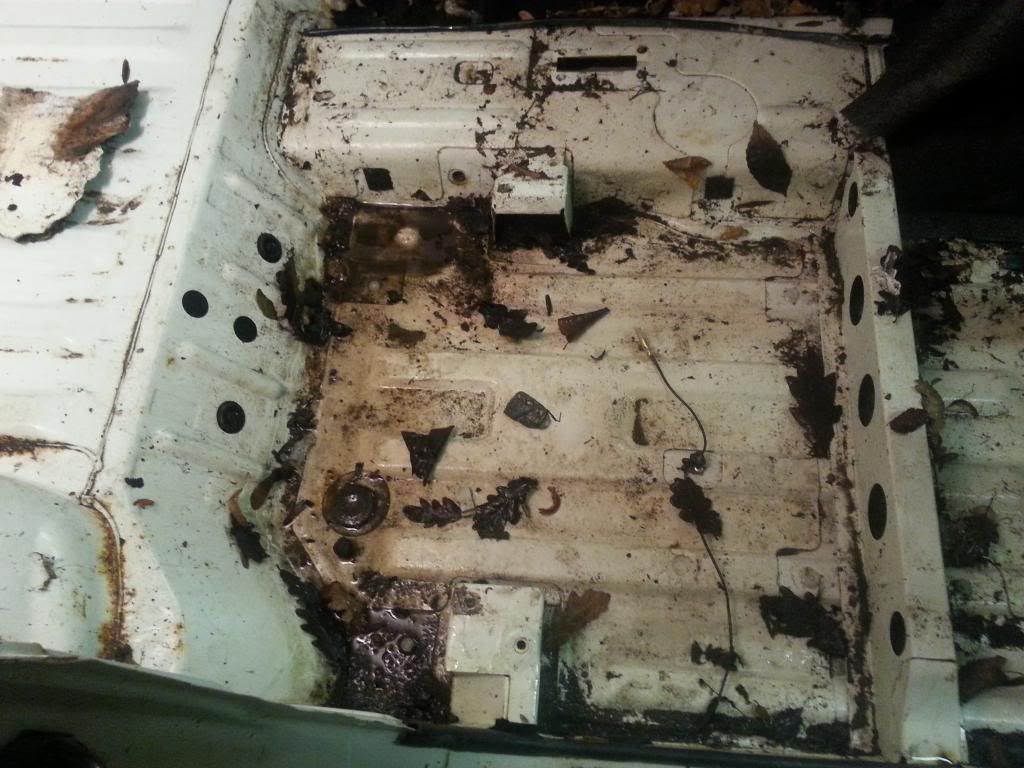
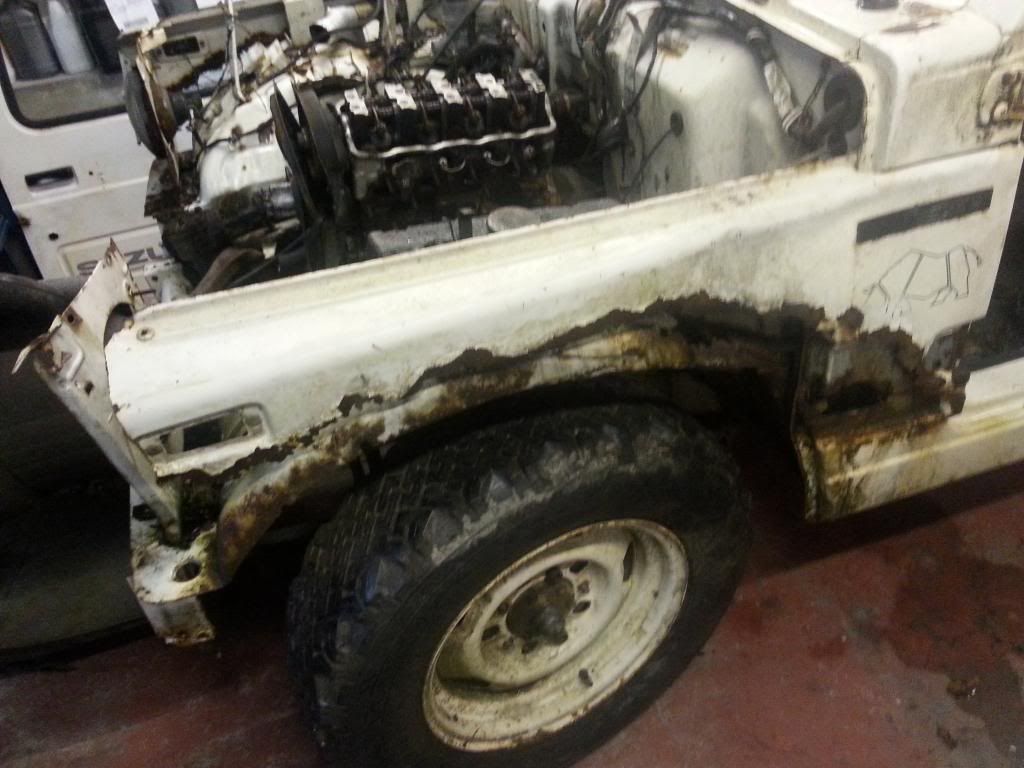
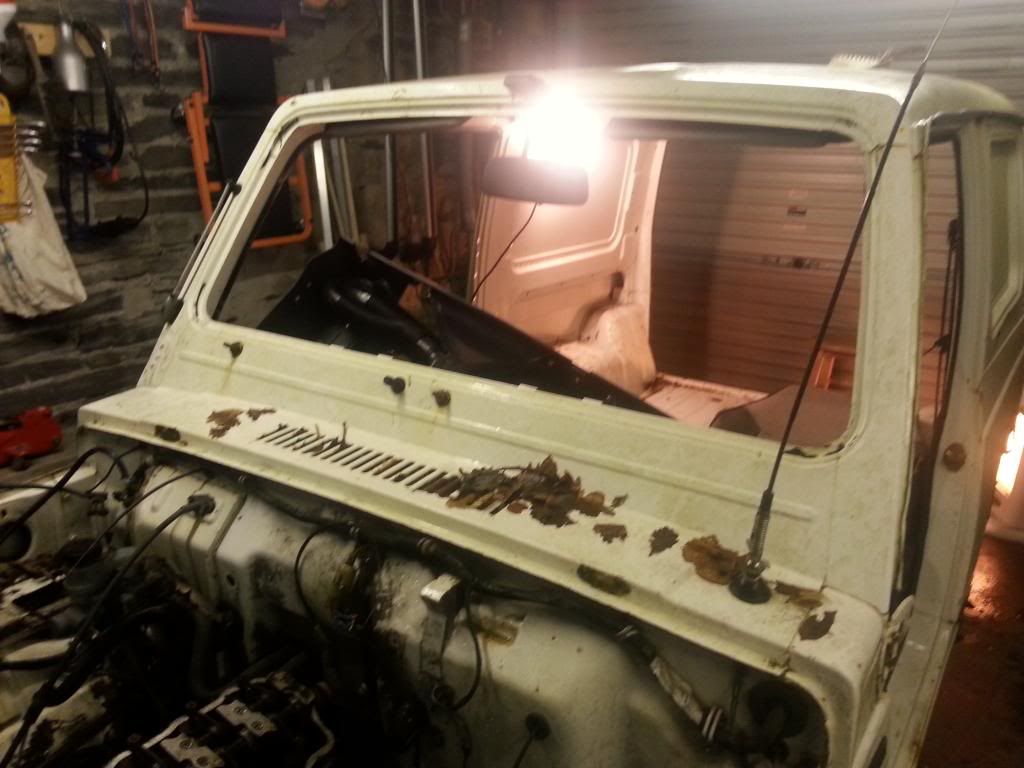
I did a bit of cleaning inside, emptied the back and took the drivers side seat out. It's now rugby time. There is a bit of work need doing, if I did a few hours every night, the current estimated time of finishing is middle to end of March. Here are some photos of the bits that need doing. I will do 90% of the work, but the dent behind the passenger door aperture and the rusty patch on the drivers side of the rear door, I will try to get someone that knows what they are doing to repair them, I highly doubt that I would be able to do a good job, we'll see.
The quick job list is:
Rear Arches
Rear bottom corners
Rear door surround, drivers side,
Dent in rear of roof
Dent just behind passenger side door
Left and Right Sills.
Passenger side foot well
Here are a few photos of what needs doing.
I'm planning on re-using the front end and side doors off my current SJ.
Huw
Gave him the £100 and set off. I wanted to stop at the local Suzuki Dealership to pick up a new speedo cable, but unfortunately what they ordered wasn't the type that I needed. Once I got home, the SJ was unleaded successfully and chucked in the garage.
I did a bit of cleaning inside, emptied the back and took the drivers side seat out. It's now rugby time. There is a bit of work need doing, if I did a few hours every night, the current estimated time of finishing is middle to end of March. Here are some photos of the bits that need doing. I will do 90% of the work, but the dent behind the passenger door aperture and the rusty patch on the drivers side of the rear door, I will try to get someone that knows what they are doing to repair them, I highly doubt that I would be able to do a good job, we'll see.
The quick job list is:
Rear Arches
Rear bottom corners
Rear door surround, drivers side,
Dent in rear of roof
Dent just behind passenger side door
Left and Right Sills.
Passenger side foot well
Here are a few photos of what needs doing.


I'm planning on re-using the front end and side doors off my current SJ.
Huw
There's three ways of doing things,
1) The Right Way,
2) The Wrong Way
3) My Way.
2 & 3 are usually the same.
1) The Right Way,
2) The Wrong Way
3) My Way.
2 & 3 are usually the same.
- dan_2k_uk
- I spend far too much time on here

- Posts: 4924
- Joined: Tue May 06, 2008 5:19 pm
- Location: Swindon, Wiltshire
Re: Restoring a SJ van body.
Looks like the bit you want has survived the best.
Think those front wings have had their day!
Think those front wings have had their day!

Janspeed manifold, LWB Vit vented discs and calipers
Build thread -- Build photos -- HLA-Artwork
Coming soon: YJs, Trussed axles, Full float rear.
- Jordi
- Bow down before me

- Posts: 7535
- Joined: Sun Nov 29, 2009 2:35 pm
- Location: Darlington, Co. Durham
Re: Restoring a SJ van body.
Nice little restoration proj.
1988 Samurai - Truck Cab & Tray Back - 1.6 8v & HIF44 - Snorkel - Stack Exhaust - PAS, YJs & 33s - Trussed, Gusseted & Pumpkin Capped Axles - 4.3 R&Ps - 4.16 T/Box - Rear Air Locker - Full Float Back Axle & Discs - RCV Front Shafts - X-Eng Handbrake - Custom Fuel Tank
- HuwJones
- Engaged 4wd low

- Posts: 126
- Joined: Fri Mar 01, 2013 6:43 pm
- Location: Knee deep in shit usually.
Re: Restoring a SJ van body.
Yes, I'm quite lucky that it's in reasonable condition. The first thing that my Dad said when he saw it was quote "What have you done now? I'm glad I didn't pay for it". But to be fair, he took it back after looking closer at it.
I had a good luck underneath whilst I was waiting for some Pocket Rocket to soak in. The chassis is in amazing condition, I poked it with a screwdriver in the places that the paint was a bit flaky and there's only surface rust.
Tomorrow I will concentrate on cleaning up the rest of the amazon from the inside of the foot wells.
The next step is to gut it, back to chassis and body. I won't separate it from the chassis yet, as the chassis will ensure to keep it straight when I'll be welding it.
Judging by the bits that are falling off the remains of the front wings, the previous owner wasn't a welder, definitely a plasterer!
Huw
There's three ways of doing things,
1) The Right Way,
2) The Wrong Way
3) My Way.
2 & 3 are usually the same.
1) The Right Way,
2) The Wrong Way
3) My Way.
2 & 3 are usually the same.
- donkeychomp
- I spend far too much time on here

- Posts: 3582
- Joined: Thu Aug 18, 2011 3:49 pm
- Location: Shepperton, Middx
Re: Restoring a SJ van body.
Pity you are so far away, I'd have those dents sorted in a jiffy.
Good luck matey!
Good luck matey!
If it ticks over...leave it
- HuwJones
- Engaged 4wd low

- Posts: 126
- Joined: Fri Mar 01, 2013 6:43 pm
- Location: Knee deep in shit usually.
Re: Restoring a SJ van body.
Any Tips and Tricks would be much appreciated! Although... I'm not worrying too much about the dents at the moment. I'm concentrating on the rust first!donkeychomp wrote:Pity you are so far away, I'd have those dents sorted in a jiffy.
Good luck matey!
Huw
There's three ways of doing things,
1) The Right Way,
2) The Wrong Way
3) My Way.
2 & 3 are usually the same.
1) The Right Way,
2) The Wrong Way
3) My Way.
2 & 3 are usually the same.