GV1600 Trials Truck

Got an vehicle build underway? post up pictures and tell us all how its going!

Builds threads only please.
RichM
Got muddy boots
Got muddy boots
Posts: 22
Joined: Fri Oct 13, 2017 5:18 pm

Re: GV1600 Trials Truck

Post by RichM » Tue Oct 17, 2017 7:58 pm

Welded on side rails

Image Image

Image

Fitted new battery as old one wouldn't hold charge. Fitted an isolator switch too as I'm finding this happens a lot.

Image
Image

In hindsight that was a really dumb place to put the switch - I don't think its going to last there but at least it will be stuck on when the key breaks off. Need to put some markings on there somewhere to make it clear that's not a kill switch - will need to add that later. I've put some protective conduit on the cable since.

Re-installed the blower housing and ducting and mounted the ECU higher up.

Image

Most of the ducting from under the dash has gone. I've kept the bit that goes at the bottom of the windscreen. I secured it with a plate and some bolts which clamp it in place. Don't have a picture of that. Might see it later in picture of securing the speedo.

RichM
Got muddy boots
Got muddy boots
Posts: 22
Joined: Fri Oct 13, 2017 5:18 pm

Re: GV1600 Trials Truck

Post by RichM » Tue Oct 17, 2017 8:28 pm

Hadn't removed the fuel tank up to now as I'd had quite a lot of electrics pulled and I wanted to make sure everything ran and started before I started dismantling rear end. Theory was if anything was wrong I knew I'd limited the scope of where I'd disturbed things. Started first time no problem so that was that.

Image

Fairly obvious where this is going but picture to see how much I'd be removing...

Image

Measured between the old rear most body mounts and found it was just over 35"s. Also that rear most cross member is where the captive nuts for the rear fuel tank bolts live. I had a vague plan...

Image

The new rear crossmember has tube welded into the holes to stop bolts crushing it and a thicker piece of plate on the inner side. In hindsight I think it may have been better to weld the angles to the chassis rail rather than tube but its okay for now.

Image

The idea is this will go on top of the remaining bit of rear chassis. The fuel tank will drop in from the front.

Apparently I stopped taking pictures for a bit. I found a spare wheel carrier off of my vitara and welded to it a piece of box and built some mounts onto the new piece. The two bits of rear crossmember pointing forwards lined up perfectly with where who existing bolt holes were in the spare wheel carrier. I nearly cut them off. Glad I didn't.

Image

The spare wheel carrier cross section needs to be detachable otherwise it'll mean cutting to get the fuel tank off in the future.

I wanted the spare tyre flat so it doesn't obscure the rear vision too much. Also keeps weight lower. Also adds some much needed weight over that rear suspension.

Right so this next bit is not an attempt at a box section roll cage to be clear.

Image

The idea is to try and add back some of the rigidity the body would have applied to back end of chassis. I'll likely remove them when it is caged and has proper back stays... these are .... temporary stays... eh?

They're bushed as they are part of the body. They are made from chassis rails from an old tent trailer I had cut up in the corner. Still need to gusset the mounts.

RichM
Got muddy boots
Got muddy boots
Posts: 22
Joined: Fri Oct 13, 2017 5:18 pm

Re: GV1600 Trials Truck

Post by RichM » Tue Oct 17, 2017 9:15 pm

This is where things start going a bit wrong. So I had the opportunity to buy a steel front axle from and xl7 and a whole load of other spares (cheers Scott!). I've already got one in my vitara - which will eventually come out of it - but wasn't really set on taking it out of action yet (although it does look a bit sad on standard gvit wheels and tyres at the moment). So I think we had fair confidence according to google that the axle housing out of a V6 auto xl7 would be 5.125... which should match the back. I've rebuilt the correct diff ratio into the one in my vitara so it would be no big deal if I had to do it again.

(apologies if I'm not meant to post links to other forums - I can take it down)

See here... http://www2.zukiworld.com/technical_spec_xl-7/

Although not here now I look at it... http://www.shropshire-suzuki.co.uk/foru ... =15&t=4176

This one is just confusing... http://www.suzuki-forums.com/1g-2001-20 ... -mt-2.html

Also this case has a bolt on tube section which makes for some interesting possibilities. Its a bit of a different one from what I've seen before but all the mounts would go straight in.

Righty so anyway despite saying I was going to leave everything standard I decided not grenading front diff is the sensible thing to do so trip down to see Scott and I've got boot load of parts...

Image

Win!

I'll come back to the diff later.

I built a surround to mount the speedo and later it can probably have a few switch mounts etc tacked it. Not very tidy but gets the thing secure again.

Image

Next then I put in some little brackets to hold the heater controls.

Image

Got it all reinstalled only to find the temperature control was switching the vent from inside to outside air! Probably would of left it like that for comedy value but the lever for air source didn't have enough travel to get full temperature. Yeah so did that twice. And its a fiddle to get those cables to stay in the plastic clips once they're out. Cable ties to the rescue. Many cable ties.

The loom to the back for the fuel tank still has electrics for the lights so thought I'd mount up the originals. I broke one off the original but fortunately I had some in my new pile of parts!

Image

The mesh bit is just to try and discourage anything flying towards the hitch going into the fuel tank. I'm thinking since I should have plated it. Another one of those cases is I had it lying around and wasn't getting used.

I welded the transmission tunnel to the back panel.

Image

I'd been thinking I'd do this from outside before but access had got a bit harder now. One of those jobs I was putting off. Decided to cut more away and eliminate the pieces of rubber which sat under the box section so I could get a tidier finish inside the cab. The hand brake cable lugs fit through their seat holes with a bit of grinding and I lock them down by slitting the top piece of steel (not done it yet in this pic) and tapping down a bend of steel. Since I've covered it in sealant.

Patched up some holes in the sill where I overcut at rear when doing the back panel frame.

Image Image

Thinking about it I did this intentionally so I could tack the bits of channel I used on the rear frame in position on the vehicle. I didn't think a tack where the bottoms of the channel met the angle would hold them when I pulled it off.

Other thing you might notice here that I forgot to mention is I hid all my messy welding and tidied up the corners of the rear panel by using piece of 1" thinner angle all round. Its aesthetic more than anything - but also means less nasty edges.

Fuel filler...

Image

Took a while to figure out how to mount this so it wouldn't get knocked but also when along roughly right angle for how the rigid bit of filler needs to point at fuel tank. Didn't appreciate it at the time but I made a mistake here. Will come back to that.

Somewhere to hang your fuel filter...

Image

Fuel lines are all long enough because I've brought the tank forwards aswell as up. Do need securing properly though.

User avatar
donkeychomp
I spend far too much time on here
Posts: 3583
Joined: Thu Aug 18, 2011 3:49 pm
Location: Shepperton, Middx

Re: GV1600 Trials Truck

Post by donkeychomp » Tue Oct 17, 2017 9:29 pm

That is an awful lot of work done! Good luck with the rest of the build.
If it ticks over...leave it

RichM
Got muddy boots
Got muddy boots
Posts: 22
Joined: Fri Oct 13, 2017 5:18 pm

Re: GV1600 Trials Truck

Post by RichM » Tue Oct 17, 2017 9:33 pm

So fuel tank went back in and I got it out of the garage for first time since it went in so I could turn it round and do some jobs on the front end with a bit more space.

Took the opportunity to take some pictures and stand back and have a look at it as to this point I've only really ever seen it from some angles standing a ft away.

(sorry for the quality of the pictures)

ImageImageImageImageImage

Drove it back in and realized my mistake from earlier!

Image

Yeah that fuel filler is violating spare wheel airspace. It'll need cutting off and moving further down the piece of metal its welded too.

RichM
Got muddy boots
Got muddy boots
Posts: 22
Joined: Fri Oct 13, 2017 5:18 pm

Re: GV1600 Trials Truck

Post by RichM » Tue Oct 17, 2017 10:50 pm

When I pulled it out I disconnected the front diff switch as I thought the gearing would be pretty awful and id have to put it in low range. To be honest it was way better than I expected and I happily shunted it around in 2H.

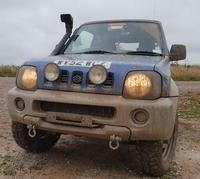
Right so got on with fitting front recovery point.

Image

Same deal as the back. Tube and a spreader. This box section is narrower than the rear but made of thicker steel. Unfortunately with the rad there I don't really have space to put angles in like the rear. The rad might move at a later date so I will probably do something about it then.

Turned attention to getting the steel diff in there. I played around with it a bit and figured out how to engage the front diff. Only two pins whereas the original one had three. Figured out that 12V one way across the pins would lock it and swapping wires would unlock it. Still wasn't 100% sure if this was a pump or an electric actuator. Also wasn't really sure if need continuous voltage. But I had got it locked in so managed to count the rotations. My maths said 5.125. Decided I'd fit a three position double pole switch to operate it from the cab. That way I could momentarily put it in and then put it back to no voltage. If it started coming out of 4wd id know I just need to leave it in one direction permanently.

I pulled the original out...

Image

It was a pig. Curse words were used. Good news is despite the picture making them look slightly different all the mounts will work! Despite the third being slightly different. The same drive shaft also fits in each diff but I didn't think that would be an issue.

Then I got that nagging feeling my maths was the wrong way around. I did it again and was fairly certain it was a ratio less than 5. I attached an air line set to <10psi onto the air line to the original diff to engage it and started doing a comparison. Sure enough they were different - and by my newer corrector maths the original was greater than 5... so had to be a 5.125 really - which is what you'd expect on a GV1600. So was looking like diff rebuild time.

Next day I headed up to my Dads place where things like engineers blue and DTI's live and also several of my Suzuki diffs from previous swaps. Also a bit of a cleaner environment for opening up diffs.
(long story short my vitara came with 5.125 in the front and a 4.875 in the back... so I broke the front case... so I ended up swapping a 5.125 into the back as it should have and rebuilding the 5.125 I didn't realize I had into a steel case - so somehow ended up with several diffs).
Other plan was to do some work on the trailer we'd be using for the Gvit.

So I got the diff apart before lunch to discover this...

Image

So its a 4.3 for sure. But also way bigger than a vitara/grand vitara diff. 12 bolts vs 10 bolts. I had a 4.875 vitara rear handy and to be honest they look to be the same size to me. If I remember right its the 12 bolt also. Unfortunately didn't have a 5.125 rear handy to see if I could swap rp over. I've got one in vitara but that would make it a bit immobile also from some googling I think it's a bit hit or miss if it will be 10 or 12 bolt and I didn't have any pictures of it before I fitted it.

I drove home thinking the next day I'd pull the vitara rear and do the swap. Common sense probably says put the original one back in the grand vitara and call it a job for another time. But it was such a pain to get out I pretty much decided if something else is going back in it's got to be better. So instead next day I encouraged a friend to come over to do some spannering!

While I waited for him to turn up...

Image

...got my wickes special fitted up. I say wickes... its more of a B&Q/Screwfix special. Hybrid. For the money though I'm pretty happy with that - and replacement parts are fairly cheap. Think the piece of silicone hose to get the screen angle was as much as the rest of it! I'll seal it and run breathers up to it another time.

Anyway back to the diff... friend turned up and we did this...

Image

So that's the steel out of the front of my vitara. I went this route because
- its not work creation as itll come out of my vitara for axle swap anyway
- its tried and tested and hasn't broken (don't really have any evidence to say the case itself of the xl7 case is any stronger - although gears itself likely are)
- I don't know how strong the engaging component of the original or xl7 diffs is - feels like something else to go wrong
- option to try stubby shaft mod on the gv as got a second bolt on shaft in pile of bits
- I know its got a 5.125 diff in it as I put it there
- it doesn't leave my vit immobile

Yeah so removed the miles of skid plates from my vitara. Eventually got the diff out. Then installed it into grand vitara...

Image

The stubby shaft won't clear the standard grand vitara mount so used the non bolt on drive shaft already on there. Can possibly be made to work but may as well prove out the gvit shafts at least!

So the XL7 diff. Plan is if the white steel axle fails the xl7 axle will go in (gear swap allowing). If something breaks inside the white steel housing the xl7 axle will go in (gear swap allowing). I'd like to take my time with it a bit and see if I can build a set of rear gears into it... and if at all possible I'd like to eliminate the switch mechanism in favor of permanently engaged typical setup. If I can get rear gear strength in a front setup that becomes quite interesting. Further the fact that the tubular section unbolts makes me wonder how difficult it would be to convert this to a central casing. Which I've been wondering about because I don't necessarily want to end up doing a live axle conversion on this thing as I'm planning that for my vitara.

Having opened the XL7 diff I know its an electric actuator which operates a toothed armature

Image

You can just make out the toothed part at the back left of the crown wheel.

RichM
Got muddy boots
Got muddy boots
Posts: 22
Joined: Fri Oct 13, 2017 5:18 pm

Re: GV1600 Trials Truck

Post by RichM » Tue Oct 17, 2017 10:51 pm

Righty so that's everything I've done so far. Will try and update as I go from now.

User avatar
ScottieJ
The Boss
The Boss
Posts: 11601
Joined: Tue Apr 15, 2008 12:13 pm
Location: Chippenham, wiltshire

Re: GV1600 Trials Truck

Post by ScottieJ » Wed Oct 18, 2017 12:42 pm

Nice work!

I do love a truck with next to no lift on big rubber :guns:
Zuki Build

Steady as she goes!

User avatar
ROBBIE
I spend far too much time on here
Posts: 4551
Joined: Tue Sep 09, 2008 6:32 pm
Location: Dorset or stuck

Re: GV1600 Trials Truck

Post by ROBBIE » Wed Oct 18, 2017 3:08 pm

Good work, keep going with it and the updates :thumbup:
Sid James gone but never forgotten
Jimny 1.6 not as good as an SJ but still good

User avatar
zook123
SCUK Addict
SCUK Addict
Posts: 948
Joined: Sun Apr 20, 2008 10:48 pm
Location: Shepton Mallet

Re: GV1600 Trials Truck

Post by zook123 » Sat Oct 21, 2017 7:11 pm

That looks awesome, will be a monster when finished!!
Image
2002 Jimny O2 Ragtop
Safari Snorkel, Freewheeling Hub Conversion
Diff Breathers, G/Box and T/Box Breathers, 2in Suspension Lift
HD Recovery Points and Winch Plate
Kuhmo KL71 MT / Goodyear Wrangler AT


Wessex 4X4 Reponse - WE411
wessex4x4response.org.uk

Post Reply