Vitara pick up project
- -Bradders-
- Got muddy boots

- Posts: 95
- Joined: Thu Dec 13, 2012 1:42 pm
Re: Vitara pick up project
Looks pretty cool! coming along nicely!!
- dan_2k_uk
- I spend far too much time on here

- Posts: 4924
- Joined: Tue May 06, 2008 5:19 pm
- Location: Swindon, Wiltshire
Re: Vitara pick up project
Skid plate looks pretty handy
Nice work
Nice work

Janspeed manifold, LWB Vit vented discs and calipers
Build thread -- Build photos -- HLA-Artwork
Coming soon: YJs, Trussed axles, Full float rear.
-
vitara_mad
- Engaged 4wd low

- Posts: 135
- Joined: Thu Sep 15, 2011 10:05 pm
- Location: dronfield , derbyshire
Re: Vitara pick up project
i can see your point too but either way it will end up with alot of mud ontop if its used at sites with lots of deep mudScottieJ wrote:Where I kind've see where you are coming from Vitara mad I can also imagine holes having a sort of cheese grater effect on the mud so more mud might actually end up on top of it with the holes there??
i would prefer holes in myself but thats the good thing about making things yourself evryone can make things just how they want them & not just copy everyone else
- plugspanner
- Engaged 4wd low

- Posts: 179
- Joined: Tue Nov 20, 2012 4:35 pm
- Location: somerset
- Contact:
Re: Vitara pick up project
thanks for the collation of posts, i will try to put them all together next time.
thanks also for your comments, i have concidered holes but the arguments for and against is a good one, it is easier to drill holes than to fill them in.
holes will only allow thin mud and water to go through but thick mud will stay on top especialy near the exhaust due to the heat.
getting it off is not a big job, but you can just get the presure hose between the plate and the bottom of tha chassis so easing the job of getting the mud out.
i will let you know if i drill any holes in it.
- dan_2k_uk
- I spend far too much time on here

- Posts: 4924
- Joined: Tue May 06, 2008 5:19 pm
- Location: Swindon, Wiltshire
Re: Vitara pick up project
hinges on one side so you just unbolt one side and it folds down to release a pile of exhaust baked mud onto the drive?
Might make it easier to get it emptied and re-located without getting filthy.
Might make it easier to get it emptied and re-located without getting filthy.

Janspeed manifold, LWB Vit vented discs and calipers
Build thread -- Build photos -- HLA-Artwork
Coming soon: YJs, Trussed axles, Full float rear.
Re: Vitara pick up project
Yeah at the end of the day mud will find its way up on top with or with out holes  I've seen a few that drop down but as long it's quite easy to get a jet hose into it shouldn't be too bad to clean out.
I nearly made a skid plate for the bottom of my SJ but changed my mind about it.
No worries about compiling the posts into one thread, just seemed like a logical thing for me to do
I nearly made a skid plate for the bottom of my SJ but changed my mind about it.
No worries about compiling the posts into one thread, just seemed like a logical thing for me to do
- plugspanner
- Engaged 4wd low

- Posts: 179
- Joined: Tue Nov 20, 2012 4:35 pm
- Location: somerset
- Contact:
Re: Vitara pick up project
got around to getting some of the other jobs this week
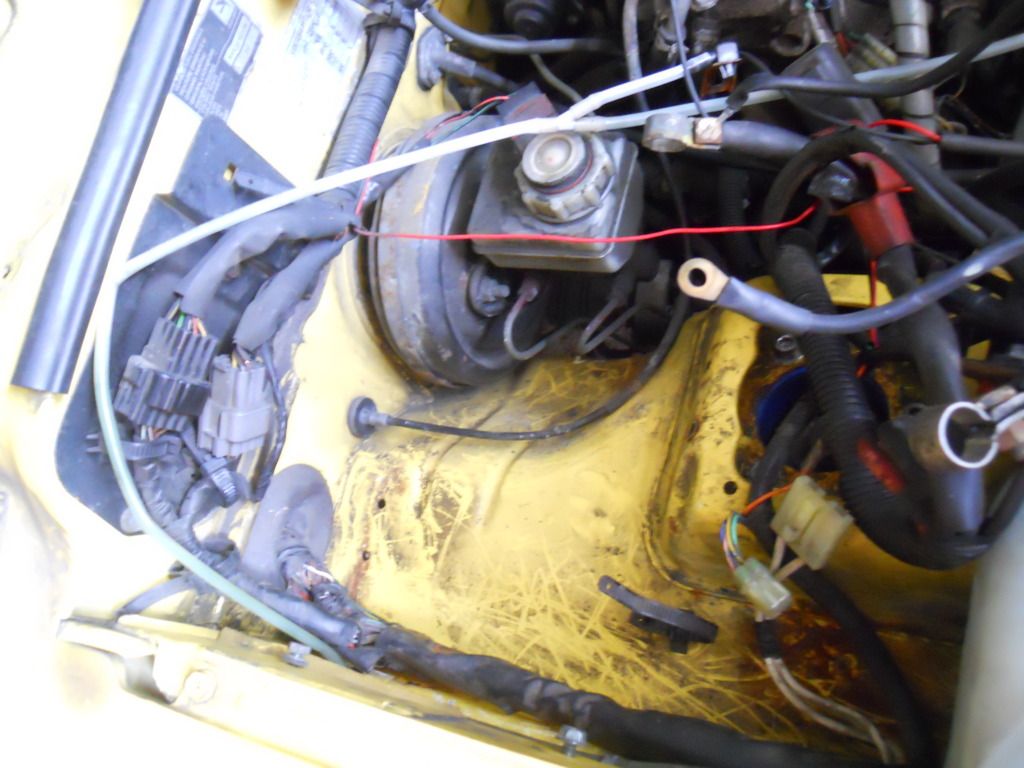
the battery was not secured very well and the 2 metal securing bars were not small enough and the battery tray was very rusty on the top so i reckoned that the top of the inner wing would be bad so i took it out.
what a job that was, could not get the 2 x head bolts out so had to grind them off with a drill mounted grind stone.
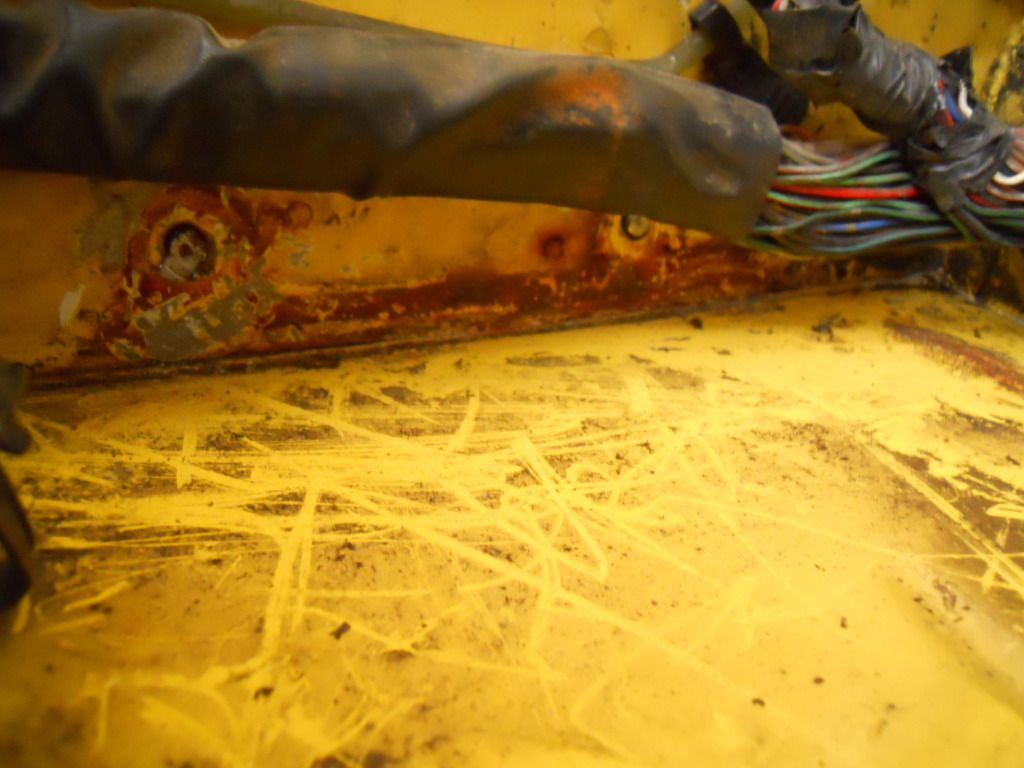
underneath however it was fine:-
the loss of the original bolt holes meant i had to find another way of securing the tray:-
i gave the inner wing a coat of yellow paint as i did not want that rusting from above,
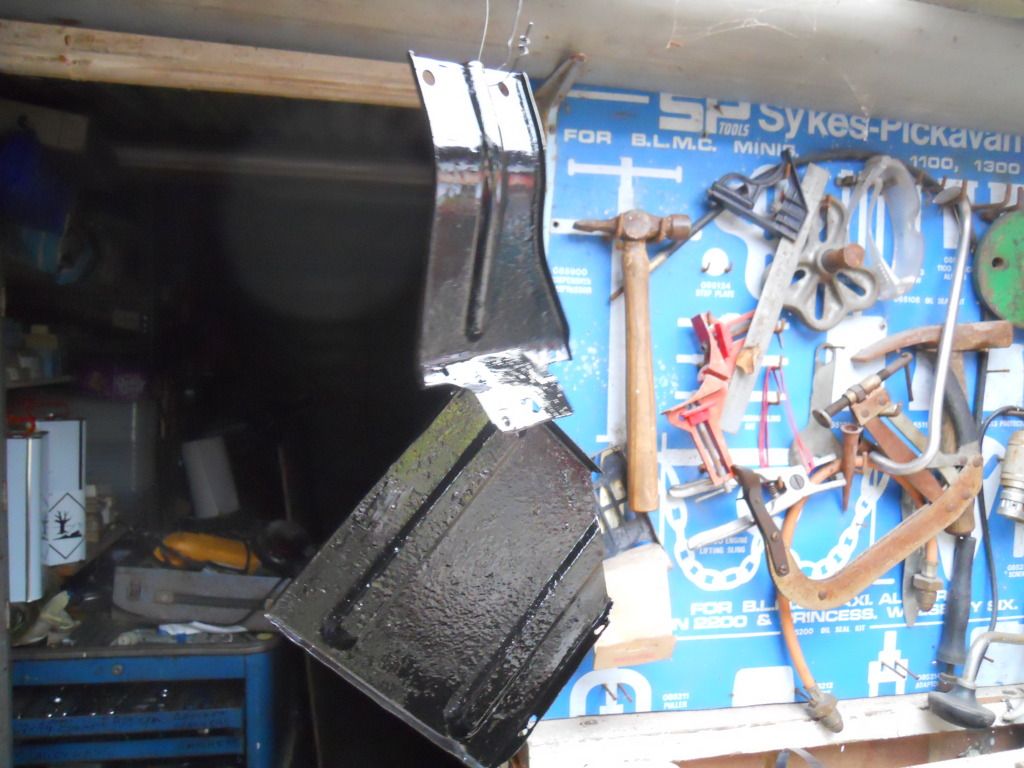
as the tray was hard to get out i decided to make into 2 parts so chiseled off the inner wing part and then drilled holes to bolt it back together and make it much easier to get out next time, they were also given a coat of black hamerite paint to keep them looking better for longer:-
i notided that there were 2 holes already near where the wiring loom goes into the scuttle so i then drilled a hole into the bottom of the tray and using some rubber sheet between the wing and the battery tray got the tray back into position and bolted it all down:-
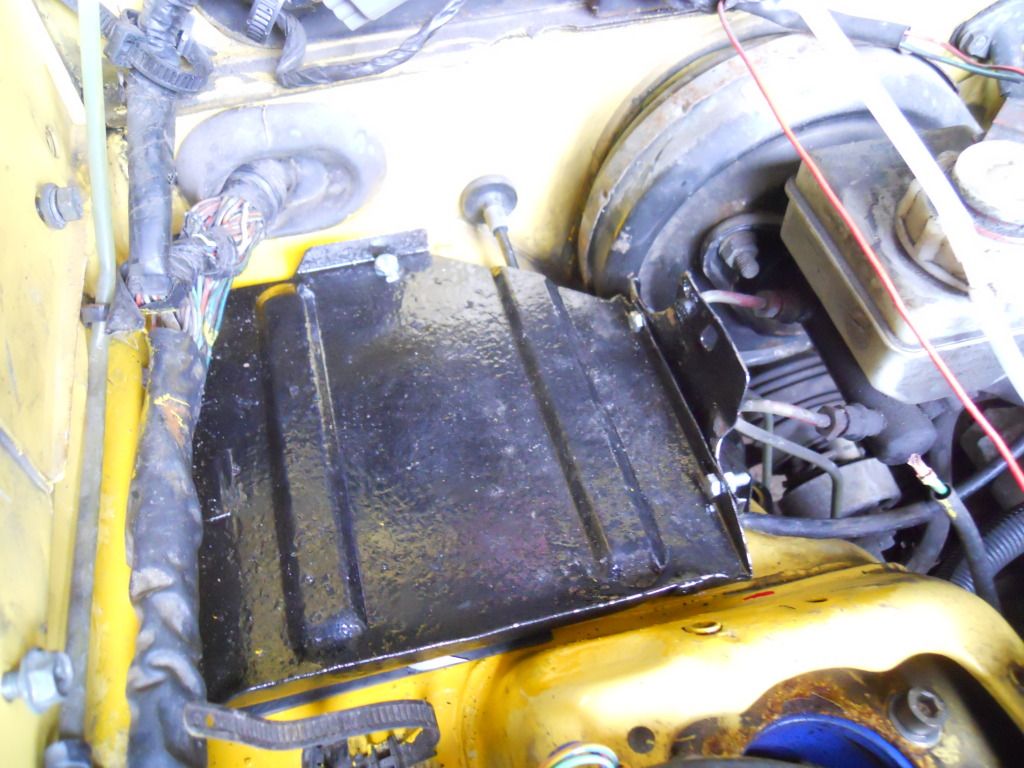

you will notice a red wire being stretched in the engine bay, i did wonder what it was and traced it to the unworking little lights in the front bumper, they did not work anyway and i believe they were not a factory fit as the holes in the bumper are not very accurate and i do not recall seeing them on other ones.
there was also a relay in the circuit and a fuse so when i had to pull the wires about to get the tray out, the fuse end snapped off i found that this was also a bit of a bodge so the relay wires and lights were all removed as i am having a winch bumper soon so they were not needed.
on further inspection the lights did not have bulbs in either!
next the battery securing brackets and windscreen wash heat exchanger.
the battery was not secured very well and the 2 metal securing bars were not small enough and the battery tray was very rusty on the top so i reckoned that the top of the inner wing would be bad so i took it out.
what a job that was, could not get the 2 x head bolts out so had to grind them off with a drill mounted grind stone.
underneath however it was fine:-

the loss of the original bolt holes meant i had to find another way of securing the tray:-

i gave the inner wing a coat of yellow paint as i did not want that rusting from above,
as the tray was hard to get out i decided to make into 2 parts so chiseled off the inner wing part and then drilled holes to bolt it back together and make it much easier to get out next time, they were also given a coat of black hamerite paint to keep them looking better for longer:-

i notided that there were 2 holes already near where the wiring loom goes into the scuttle so i then drilled a hole into the bottom of the tray and using some rubber sheet between the wing and the battery tray got the tray back into position and bolted it all down:-


you will notice a red wire being stretched in the engine bay, i did wonder what it was and traced it to the unworking little lights in the front bumper, they did not work anyway and i believe they were not a factory fit as the holes in the bumper are not very accurate and i do not recall seeing them on other ones.
there was also a relay in the circuit and a fuse so when i had to pull the wires about to get the tray out, the fuse end snapped off i found that this was also a bit of a bodge so the relay wires and lights were all removed as i am having a winch bumper soon so they were not needed.
on further inspection the lights did not have bulbs in either!
next the battery securing brackets and windscreen wash heat exchanger.
- plugspanner
- Engaged 4wd low

- Posts: 179
- Joined: Tue Nov 20, 2012 4:35 pm
- Location: somerset
- Contact:
Re: Vitara pick up project
been a bit quiet on the vitara project as of late but i have got some work done, the rear bumper.
my rear bumper has been crashed into in the past as the left fog light is missing, the right one is under the wheelarch, the holes are taped over and after the odd bash on the bumpers and seing all of the rust fall out i decided to take it off and see.
the steel reenforcing frame was totaly shot on the right and the left was not much better but the chassis and mounts were fine.
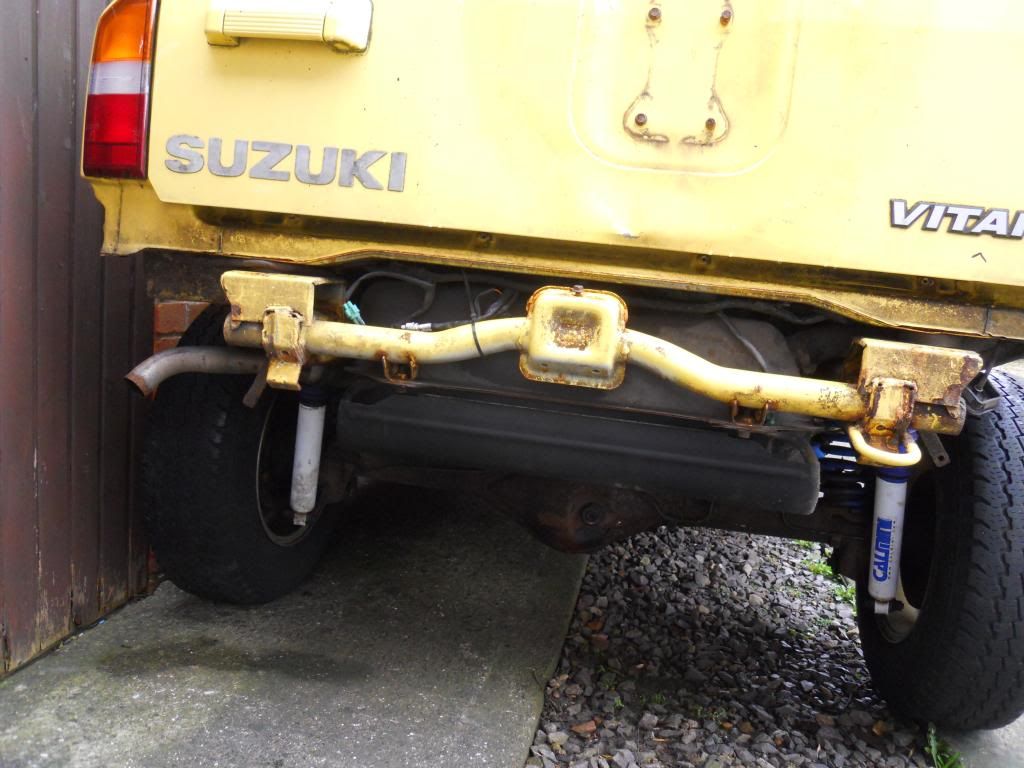
i don't know about you but i also think the rear of a vitara without bumpers looks ugly.
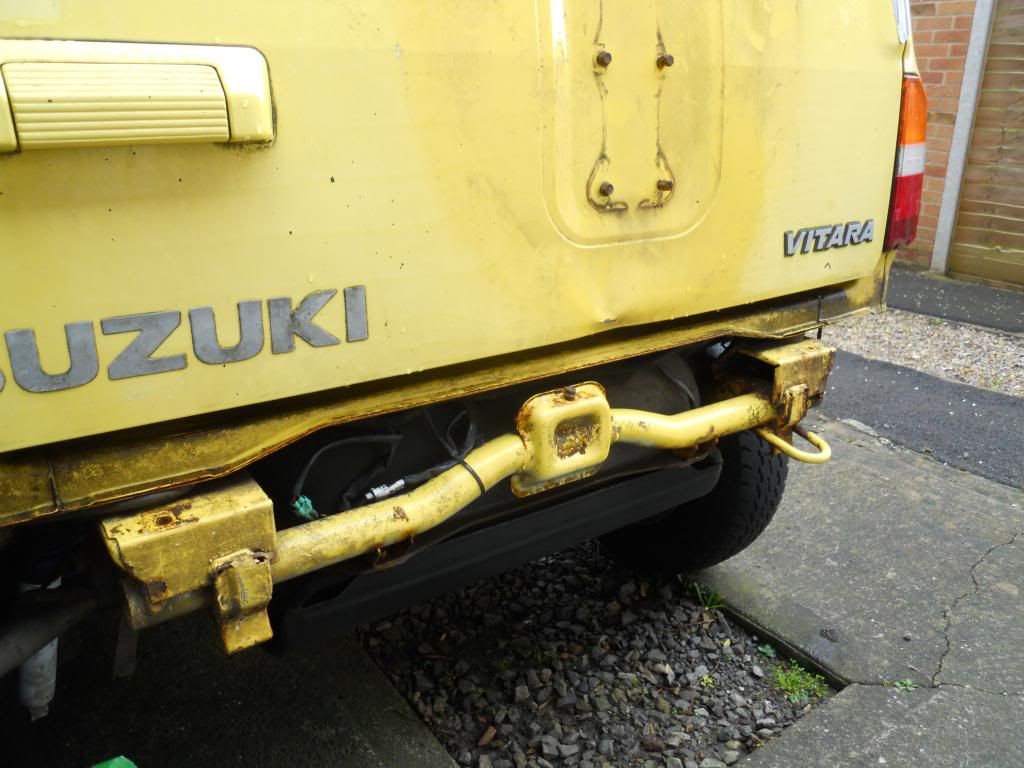
i wanted a tube one after seeing some nice ones on google images.
i fancied having a go myself and practice my welding, so i got hold of some 35mm tubes, a few odd angle brackets and some flat plate.
i wanted to use the original steel inner bumper mounts as they were ok and it gave me something to fix to without having to weld on new mounts.
i used some 35mm exhaust clamps welded to the tubes to not only give it strength but also to keep it all together when i weld and carried it as my car is about 50 yards away from my workshop and electric supply so i have to continualy measure, walk, weld and re-adjust all weekend, this took a lot longer than planned, luckily it did not rain the weekend chosen.
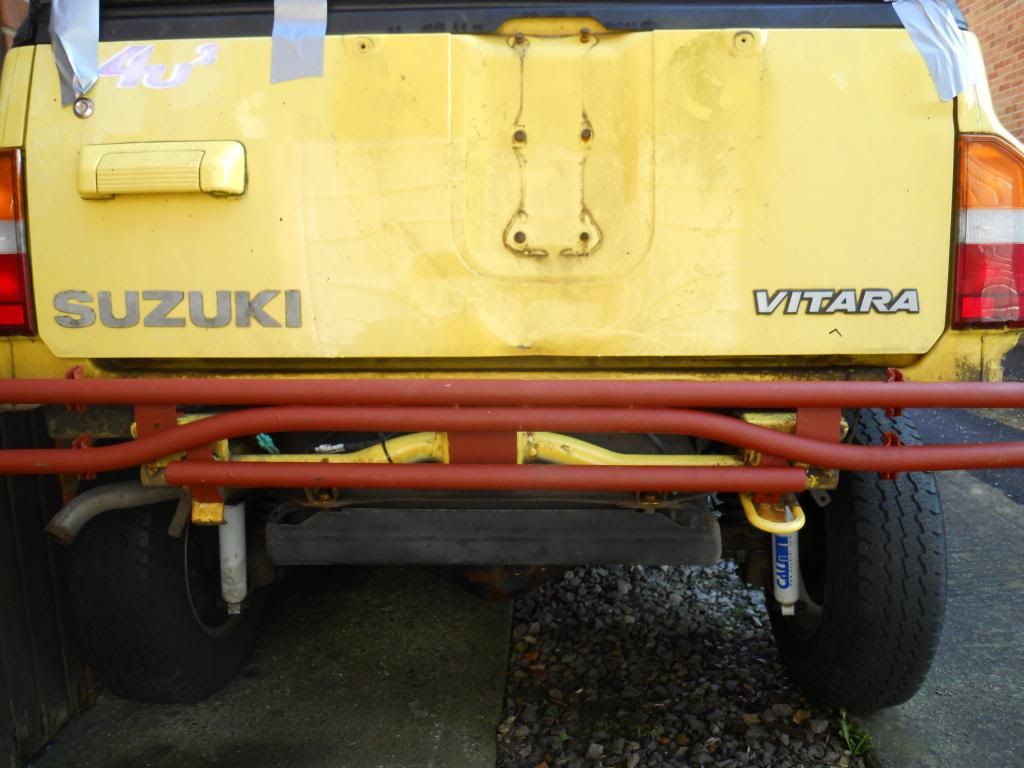
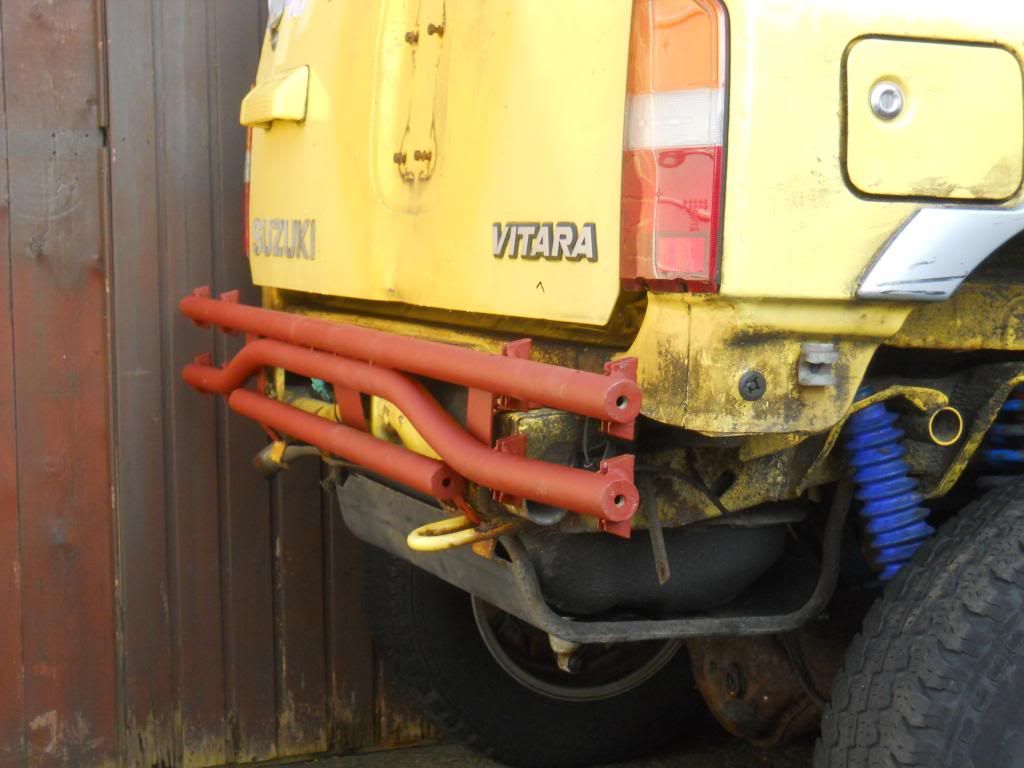
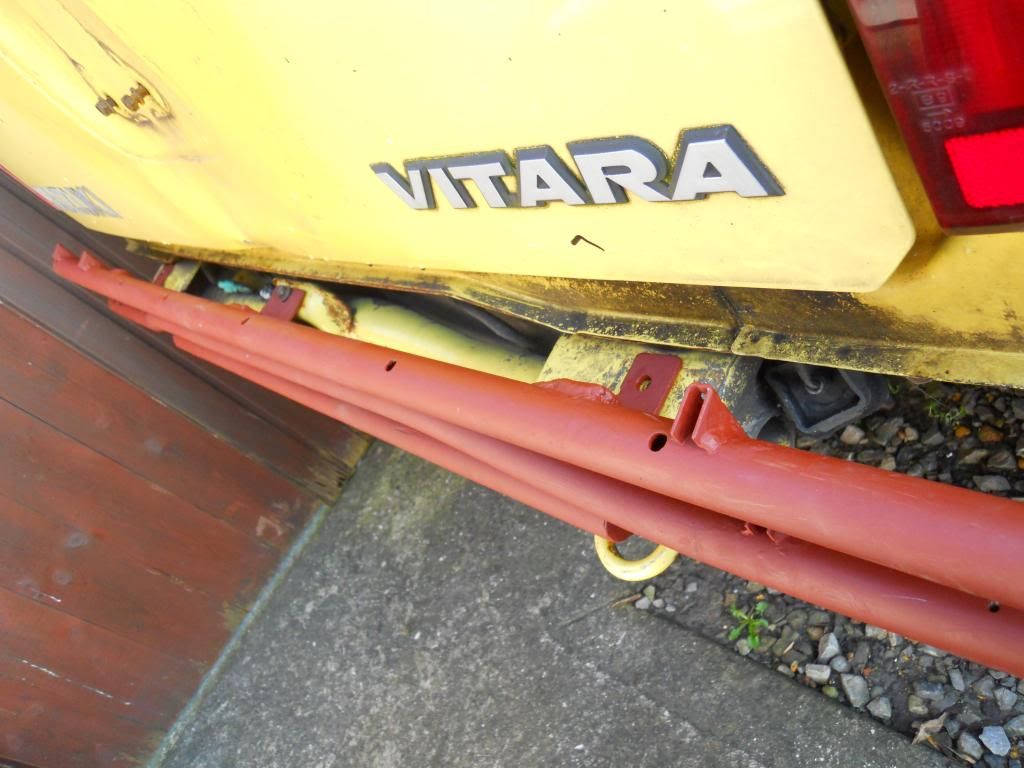
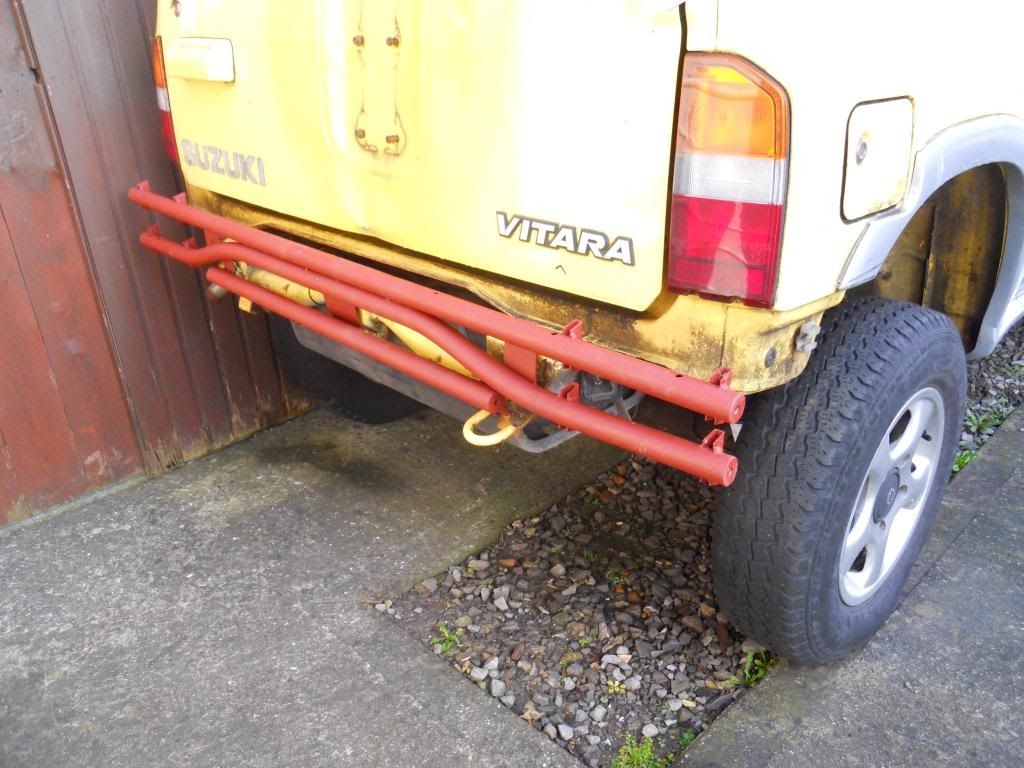
i still have to fix on the flate plates that go between the 2 bars at the exhaust sadles, i also welded washers over the ends of the tubes with nuts weled to them so i can fix things to the ends of the bumper to finnish it off.
i am going to plate in the gap under the tailgate and carry this down to behind the bumper to blend it all in as i do not want the chassis showing too much as it still looks ugly and also carry this around to the bit between the rear arch and bumper.
i just painted it in red oxide ready for the camo green paint, another job for when the temp get higher as the red oxide took ages to dry as it is cold.
i am pleased with the results and it is certainly stronger than the original one, i even managed to fix the welder during the exercise so even the welding got better as i went on!
the next stage is the front, hoping to get a winch bumper tomorow at the donington 4x4 show.
thanks for looking
shaun
my rear bumper has been crashed into in the past as the left fog light is missing, the right one is under the wheelarch, the holes are taped over and after the odd bash on the bumpers and seing all of the rust fall out i decided to take it off and see.
the steel reenforcing frame was totaly shot on the right and the left was not much better but the chassis and mounts were fine.

i don't know about you but i also think the rear of a vitara without bumpers looks ugly.

i wanted a tube one after seeing some nice ones on google images.
i fancied having a go myself and practice my welding, so i got hold of some 35mm tubes, a few odd angle brackets and some flat plate.
i wanted to use the original steel inner bumper mounts as they were ok and it gave me something to fix to without having to weld on new mounts.
i used some 35mm exhaust clamps welded to the tubes to not only give it strength but also to keep it all together when i weld and carried it as my car is about 50 yards away from my workshop and electric supply so i have to continualy measure, walk, weld and re-adjust all weekend, this took a lot longer than planned, luckily it did not rain the weekend chosen.


i still have to fix on the flate plates that go between the 2 bars at the exhaust sadles, i also welded washers over the ends of the tubes with nuts weled to them so i can fix things to the ends of the bumper to finnish it off.
i am going to plate in the gap under the tailgate and carry this down to behind the bumper to blend it all in as i do not want the chassis showing too much as it still looks ugly and also carry this around to the bit between the rear arch and bumper.
i just painted it in red oxide ready for the camo green paint, another job for when the temp get higher as the red oxide took ages to dry as it is cold.
i am pleased with the results and it is certainly stronger than the original one, i even managed to fix the welder during the exercise so even the welding got better as i went on!
the next stage is the front, hoping to get a winch bumper tomorow at the donington 4x4 show.
thanks for looking
shaun
- donkeychomp
- I spend far too much time on here

- Posts: 3582
- Joined: Thu Aug 18, 2011 3:49 pm
- Location: Shepperton, Middx
Re: Vitara pick up project
That rear bumper looks very funky. Is the duct tape holding the roof on? 
Alex
Alex
If it ticks over...leave it
- plugspanner
- Engaged 4wd low

- Posts: 179
- Joined: Tue Nov 20, 2012 4:35 pm
- Location: somerset
- Contact:
Re: Vitara pick up project
thanks, i based it on the rear one on my hilux.donkeychomp wrote:That rear bumper looks very funky. Is the duct tape holding the roof on?
Alex
we live in one windy place and as the roof has not been fitted too well i wanted to make sure it did not get wet inside so i used tape to seal up the joins when it rains and the wind blows a gale.
