Page 16 of 22
Re: Zuk on 38's
Posted: Sun Jun 10, 2012 11:14 pm
by TanZuk
Here are some pics loading the motor with the components. Everything that was modified or components that were added actually fit with no issues.
There was only one problem when the Stock Original radiator when drained. There was just too much residual rust to even thing about reusing it again. Did a good cleaning of all the hoses, block and metal tubes before the motor was installed. Ordered an Aluminum Radiator and will be here this week.
Drives Side Component pic. Laying out the additional reservoirs, AC condenser and hoses to make a clean engine compartment. This is going to be a tedious job with it being over 100 degrees in the shop now.
Went with the electric rad fan because it has an option for AC. There will be no need to try and sandwich a small fan between the front nose and condenser now.
PS/AC components in they’re living spots with no issues.
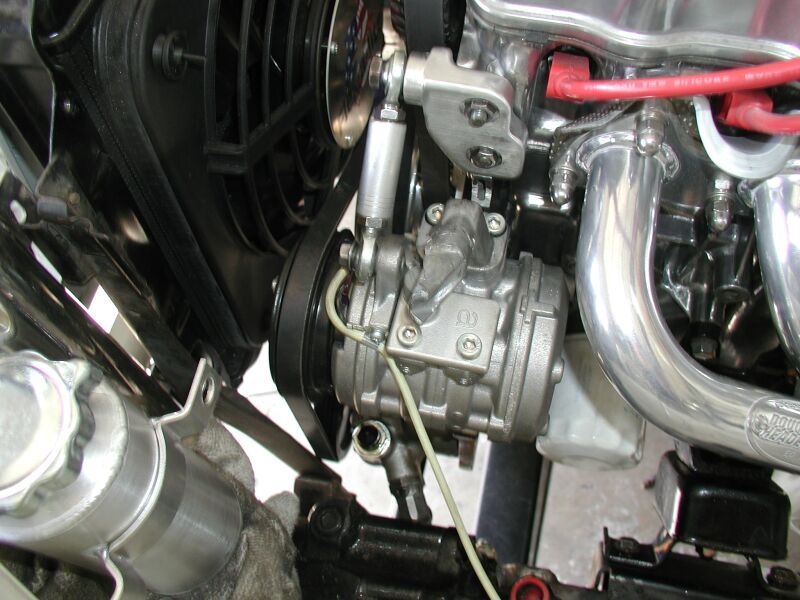
PS Pump Custom Return Elbow Fitting
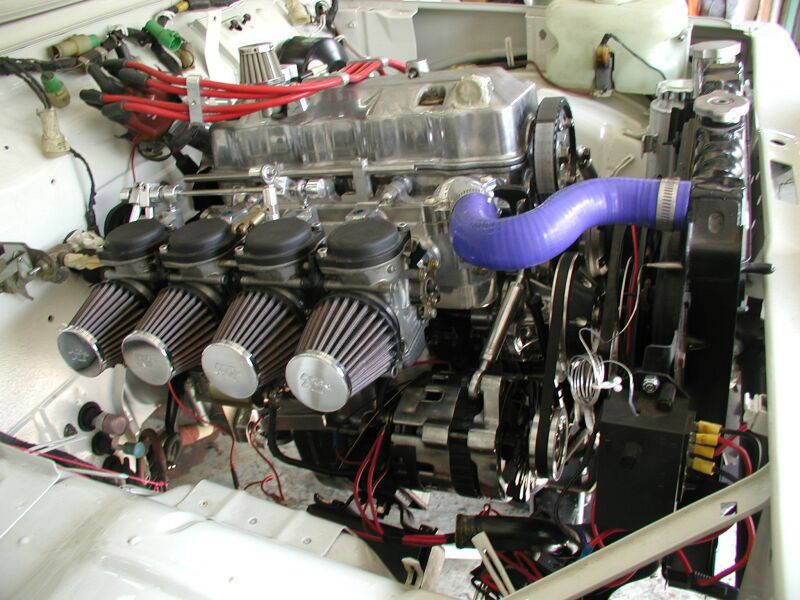
Passenger Side components
Re: Zuk on 38's
Posted: Mon Jun 11, 2012 3:42 pm
by turbo-tom
TanZuk wrote:
Passenger Side components
that just engine p*rn


Re: Zuk on 38's
Posted: Fri Jun 15, 2012 8:01 pm
by TanZuk
Hey Tom,
That is a pretty good description of the engine compartment.

Thanks for checking in and the comments.
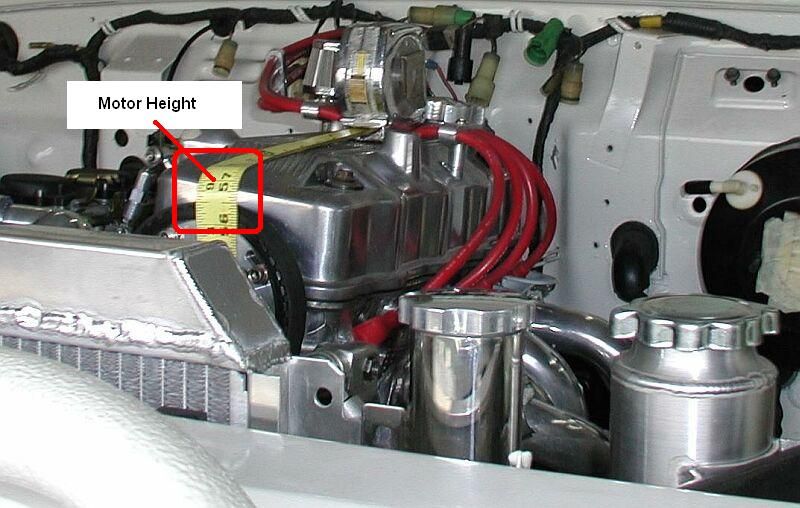
Wanted to show a scaled pic of the height of the motor for Reference.
I’m 5’ 11” and this pic was taken flat footed on the ground.
Motor Height
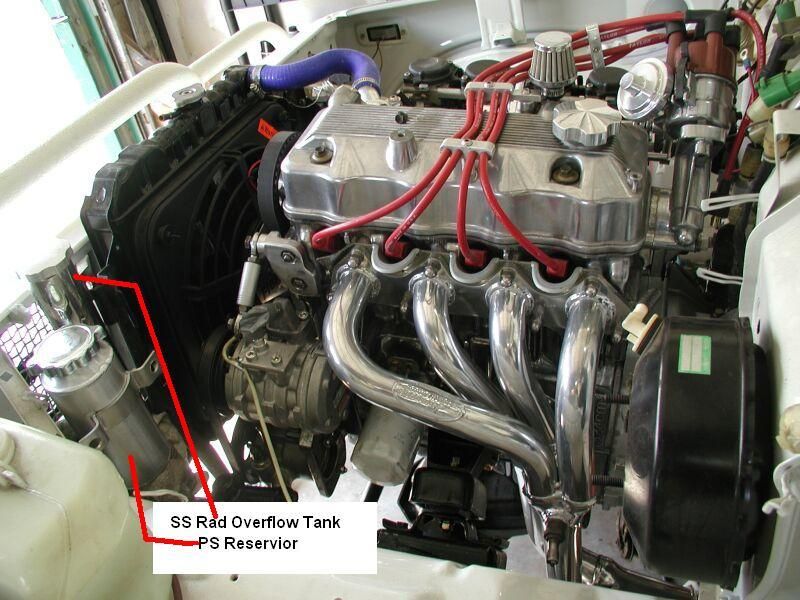
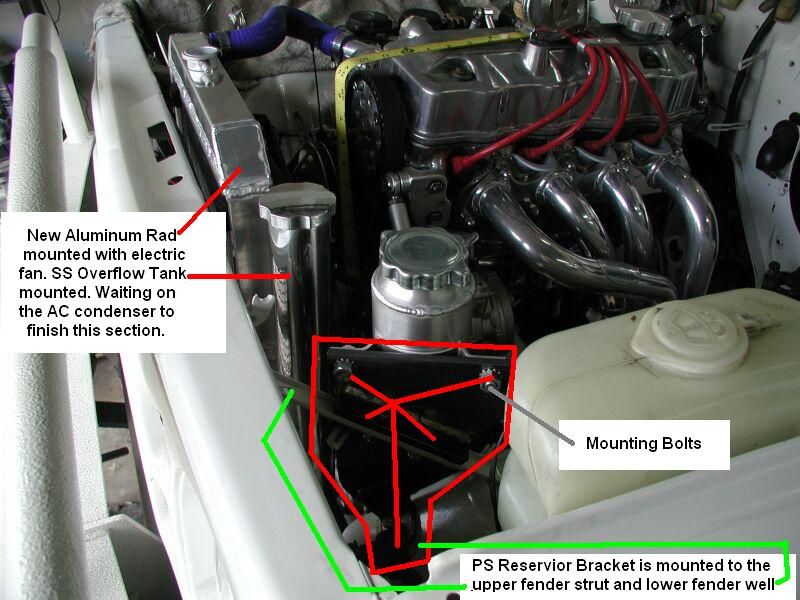
Installed the new Aluminum Rad and Electric Rad Fan. Fabbed up a mounting bracket for the PS Reservoir and mounted the SS Rad Overflow Tank.
This pic was taken standing on a 5 gallon bucket. This is how the engine compartment pics have been taken.
The 15” PS Finned Cooler showed up today and the AC condenser should be here middle of next week. No need to fill the Rad with water just to start the motor and have to drain it in a couple of days. Need to finish up with the remaining components that still need to be fitted and installed.
Re: Zuk on 38's
Posted: Fri Jun 15, 2012 10:36 pm
by ScottieJ
Looks awesome Terry

good to see some nice and shiny accessories to go with the polished engine. Looking forward to a video of the zuki moving under its own power.
Is the wiring loom standard or have you built it up yourself? Looks like there's a lot of connecters compared to the standard wiring looms fitted in the UK.
Re: Zuk on 38's
Posted: Fri Jun 15, 2012 10:59 pm
by TanZuk
Hi Scott, nice to here from you and hope things are going well.
The wiring harness is still stock. I will be making changes to it when the time comes. I have added an additional accessory fuse block on the passenger side under the glove box mounted to the support bar.
That was expensive and very time consuming to do.
Just trying to get all the parts together for the engine compartment then all of those will be polished to match. You would be surprised how much stuff has to go into such a small area for a street Rig. Will be playing plumber soon with the AC and PS hoses and making hose holder for a nice clean install.
Actually nothing is really bolted in to stay just incase things need to be removed for some reason. So the video will not be until Jan. Just have too many things that need to be made and completed to think that far ahead. I think that you are getting more excited then me at this point. I was just happy that I finally found an AC condenser after searching for 2 weeks for one.
Stay in touch Terry
Re: Zuk on 38's
Posted: Sun Jun 24, 2012 7:26 pm
by TanZuk
WOW, Getting a lot of lookers. Hope that you are enjoying the build and pics. Sorry for not speaking good UK automotive terminology, I see by looking at some of the other threads that things are known as something completely different from the US terminology. I get confused reading them
Re: Zuk on 38's
Posted: Sun Jun 24, 2012 7:28 pm
by TanZuk
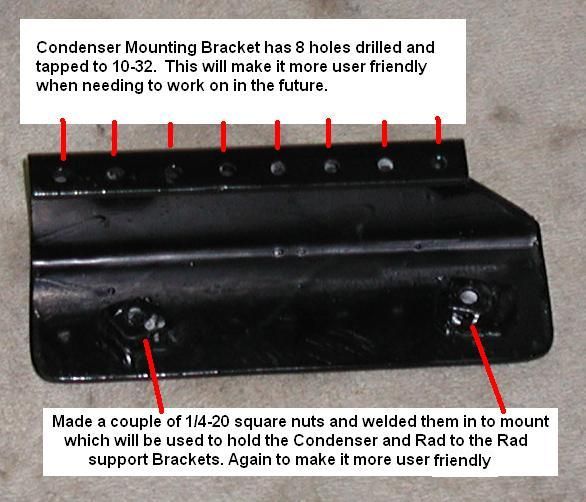
The condenser Brackets are made. As usual they took much longer to do then 1st looking at it. Also used Ospho metal prep on them and a coat of POR50 to try and keep the rust down being they are in the front catching all the elements.
Changed my mind a couple of times because the Brackets need a couple of bends. Never seem to have enough tools when you need them, so I had to do some bending the hard way. After getting everything bent up and the Condenser spaced from the Rad. I probably could have used a piece of 2x3x1/8 box tubing and cut it down to fit eliminating the need to do any bends. That would have saved a bunch of time.
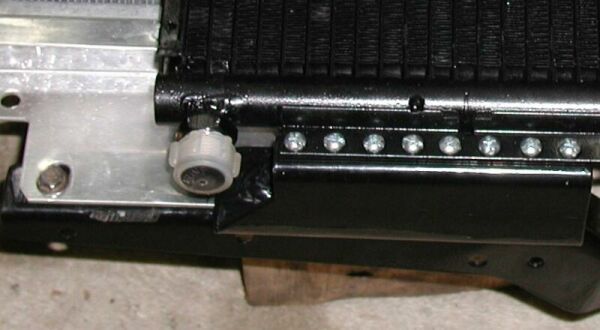
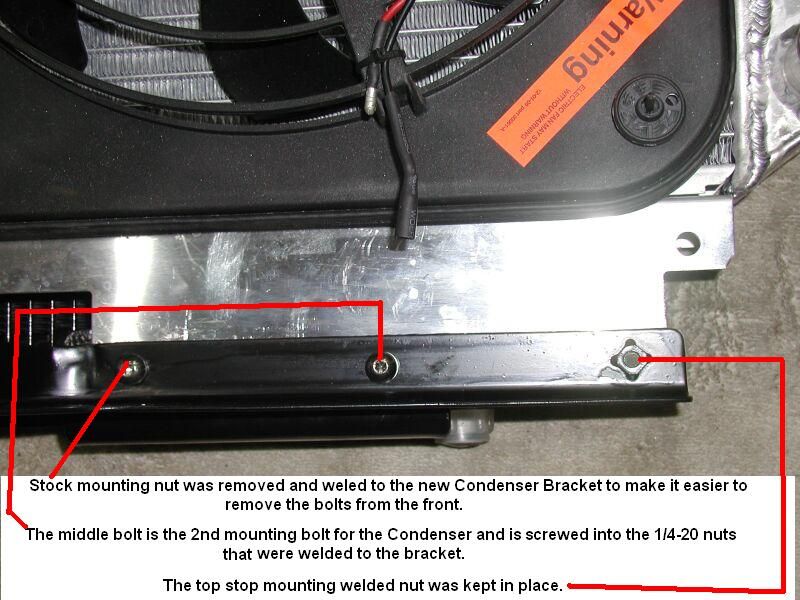
Here is the Condenser mounted to the Rad and Rad Support Brackets. This can be loaded as one unit from the engine compartment to be mounted.. This makes a much more user friendly to install. The mounting bolts holding the condenser in place are located in the engine compartment with welded in nuts there is no need for another wrench.
Condenser Bracket
Bracket Mounted
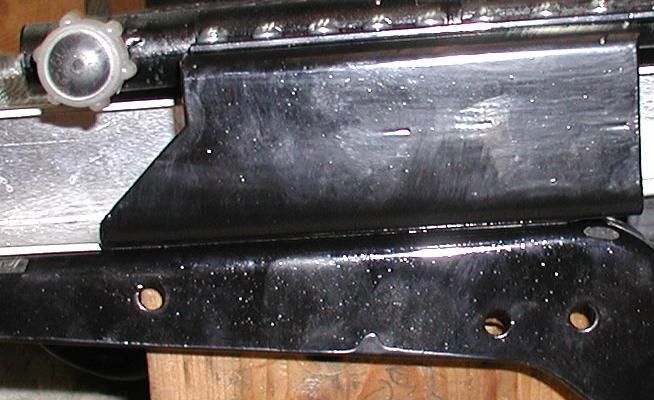
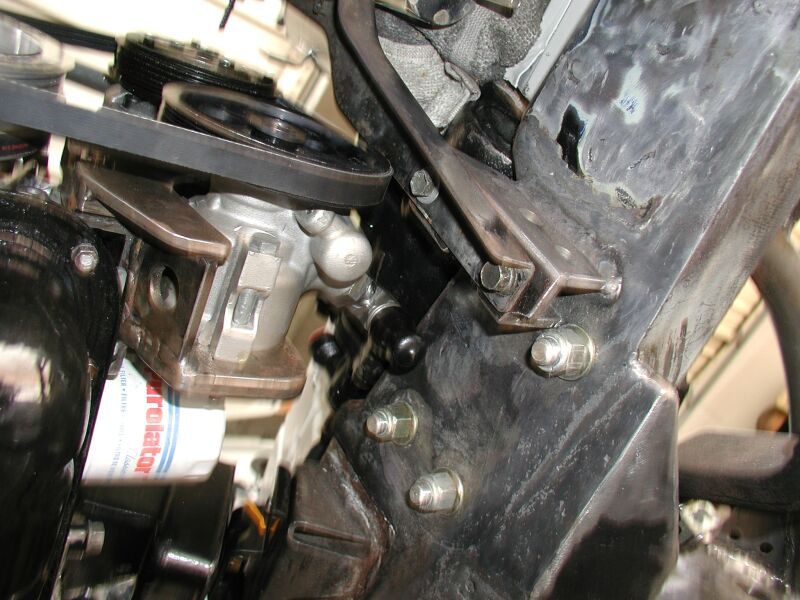
Front Side Mounting Bolts
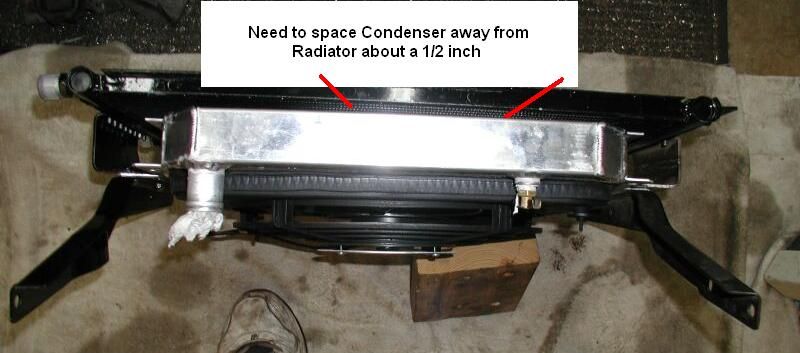
Condenser Radiator Spacing
Need to get the newly installed motor started now this has been knocked off the list. Then there will need to be some time spent on getting the PS and AC plumbed up with some hose and solid lines..
Re: Zuk on 38's
Posted: Tue Jun 26, 2012 11:58 am
by ScottieJ
That's a very tidy little install
Re: Zuk on 38's
Posted: Tue Jul 03, 2012 6:09 pm
by TanZuk
Thanks Scott, That seems to be what I seem to strive for on this build. Have to make sure that I use up the space available wisely or there will not have enough room for the other bits need to be installed.
Nothing worse then seeing bits fighting for room in the engine bay.
Re: Zuk on 38's
Posted: Tue Jul 03, 2012 6:11 pm
by TanZuk
Just added this thread in the build and tech section. There are pics and descriptions of other builds that I have done in the past. If you want to take a look here is the
Link
http://forum.suzukiclubuk.co.uk/vi ... 34/t,5070/