Page 4 of 22

Re: Zuk on 38's

Posted: Fri Feb 24, 2012 2:35 am
by TanZuk
I will keep the Tip Theme continuing

Here are a couple more tips when rebuilding the motor:

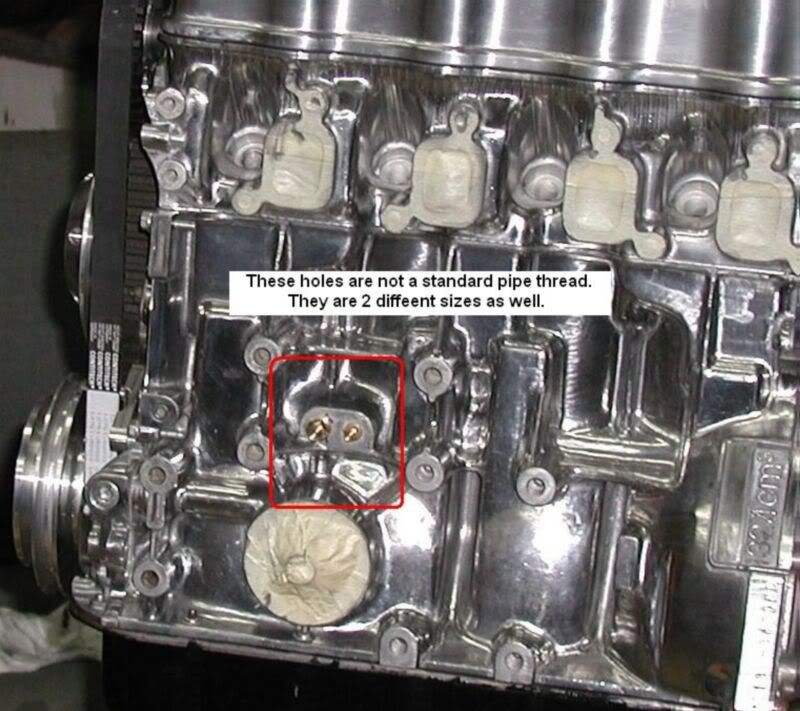
Oil Pressure Fittings.

I thought that I would add this because it really isn't covered much. The oil pressure fittings on top of the oil filter are NOT standard pipe threads. I have read on several posts that it is OK to just thread your accessory oil line in and there is no problem.

CAUTION:
You are asking for trouble if it decides to let go. You are just cross threading it in and the only thing that is really holding it in is the taper.

If you are rebuilding the motor it would be a good time to do this. I would not advise doing it with the motor in the Zuk because of the metal shavings that will get in the motor.

I wanted to see how many chips would actually get in there while I was doing it on the engine stand with the motor positioned like in the pic but facing the floor. This is the hard way but I wanted the chips to fall out by gravity also. I used grease on the tap. I also made an extension for the vacuum and sucked out everything I thought. Well, that long oil passage that runs from end to end still had some chips in it. I had to use a bore brush to get them out.

I would only suggest re tapping them at rebuild.

If you are planning on an oil pressure line. I read that there are adapters from the stock thread to a NPT. I haven't got any PN's or have I tried to find any
Image

Re: Zuk on 38's

Posted: Fri Feb 24, 2012 2:37 am
by TanZuk
Priming a new motor build with oil

I have been a Chevy motor guy for awhile now and have built up a few motors. You can use the distributor pickup drive adapter to spin to prime the motor. This is simple enough.

I was very concerned about starting what is known as a dry engine. The Zuk motor has no real way except the starter motor to do this priming, The problem with that is it spins a bit too fast, it will cause friction and you still really don't have any oil in the areas that are critical.

I did find a work around. Not the best way and it is messy and a bit time consuming.

Better safe than sorry.

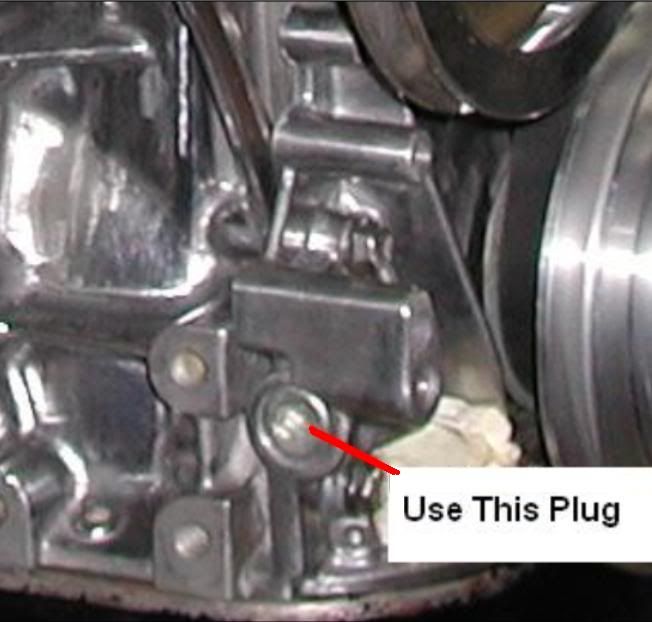
I pulled the plug fitting off the pass side oil pump and threaded a pipe fitting with a 3/8 hose end on it.

CAUTION:
You have to be careful treading the fitting in because the threaded hole is a (BSPT) British Standard Pipe Taper thread. Put some thread sealant on it and just snug it. Then pump in 2 or 3 quarts of oil.

I used a suction pump I got at Harbor Freight.

This will push oil up through all the passages. When you have finished (this is the messy part) take the fitting out and reinstall the plug and use thread sealant on the threads. This should also fill up the oil filter as well. I also put oil in the filter and let it set for a while to let it soak the oil up and then install. Be sure you do this before the priming is done.

Then put the remaining quarts you have left in the oil fill in the valve cover. Now you can use the starter motor

CAUTION: DO NOT continually crank the starter!! Do it in intervals you can still create heat.

It is still not going to pump up immediately but everything that is critical should be coated from the priming you just did and the assembly lube that I hoped you used.

I did mention earlier about those oil plugs that need to be re threaded above the oil filter to NPT. It would be a good idea to install an oil pressure gage in one of those holes now to monitor when you get oil pressure.

(THIS WILL STILL NOT SHOW UP IMMEDIATELY BE PATIENT)

CAUTION: BE SURE TO PULL COIL WIRE BEFORE CRANKING THE STARTER.

When you get the pressure it is now safe to start. Run at about 2000 RPM for 20 min for break in.

The pic will have an arrow at which plug to use to prime with.


Image

Re: Zuk on 38's

Posted: Fri Feb 24, 2012 2:38 am
by TanZuk
Motor Tips Continued

Hybrid Motor Parts Match

Which ever block you are using. (Use that head gasket)

When using a1.6 Head on a 1.3 use this Distributor combination:
1.3 Dizzy
1.3 Dizzy Housing

Press the 1.6 Dizzy Drive Gear off the Cam and install the 1.3 Dizzy Drive Gear or you will have premature wear of the Dizzy.

Note:

There is a difference in length of the gears. You can tell by looking in the Housing Bore. The gear will look like it is extended too far in the Housing Bore if you have the wrong one.

You will need to use the 1.3 Front Timing Gear on the cam.


CATION When Purchasing A New Head:

It is not easy to find a good head. These motors were made to eat themselves especially the head. When I bought my first (New Zuk in 87) the joke was they had a 50 Thousand mile Throw Away Motors in them.

More than likely someone is going to sell you something that has oversized cam journals in it. They don't have cam bearings to replace you have to send them out and get them machined for the new selves they sell. The way I found this out I had a few merchants sell me bad heads. I have the equipment to check the bores and they were oversize and I sent them back. This was after spending time talking to them on the phone and asking this specific question about the oversized conditions before purchase. Be prepared for a lot of smoke being blown up your ### from some of these merchants.


Hope This One Helps.

This info I have not come across in any of the research I have done in several years. I had to learn the hard way.

Re: Zuk on 38's

Posted: Fri Feb 24, 2012 2:40 am
by TanZuk
Ok, I will take a break from the tips.

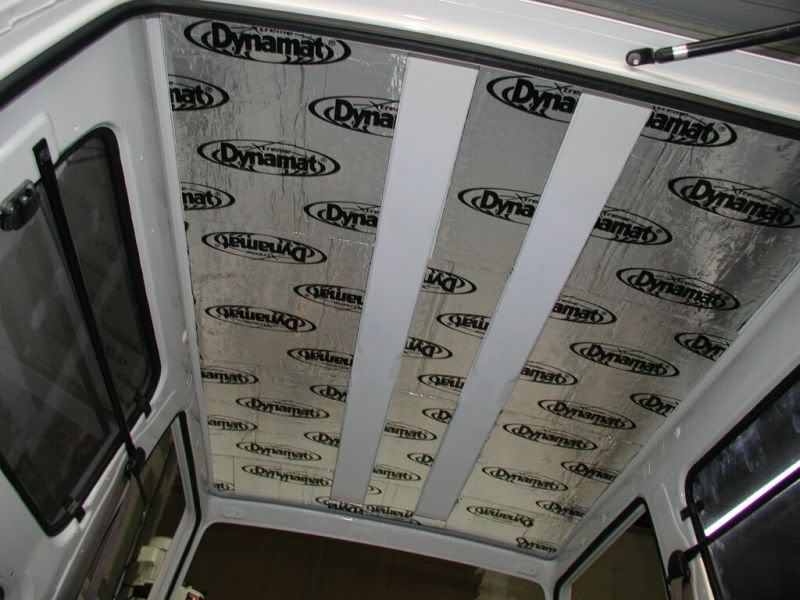
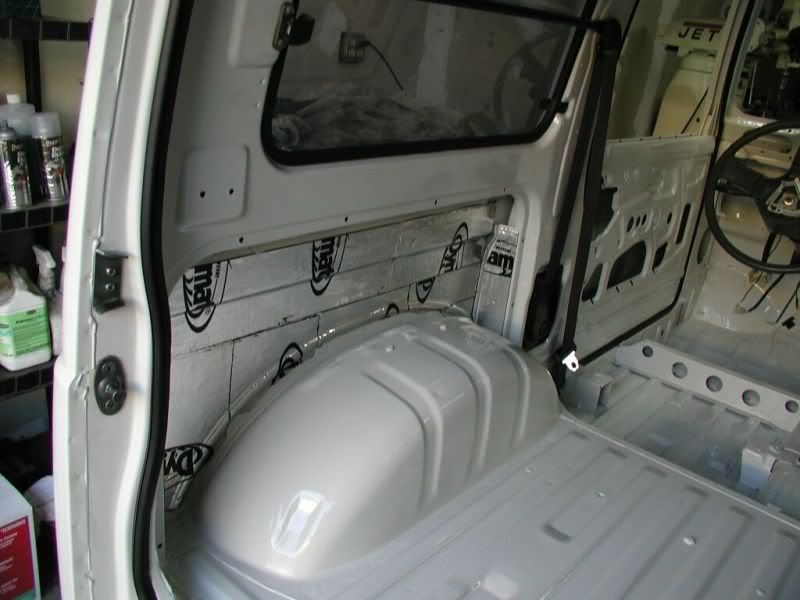
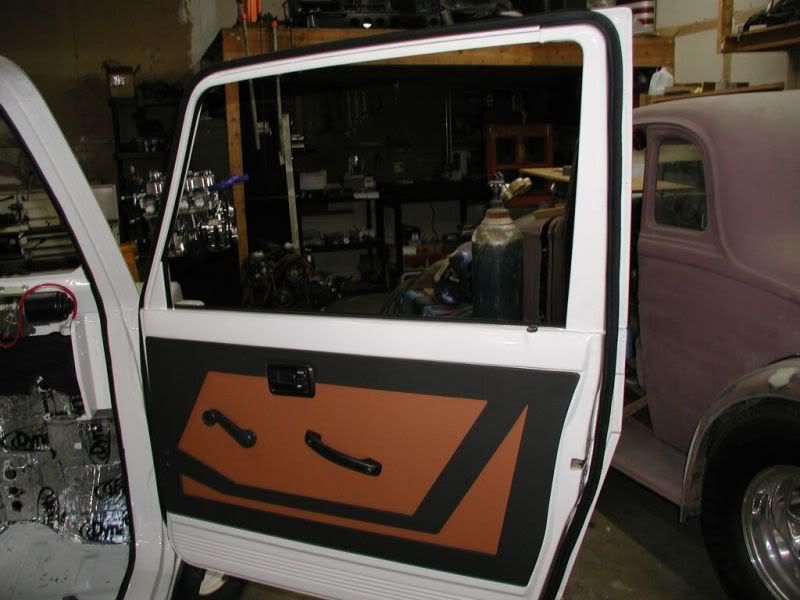
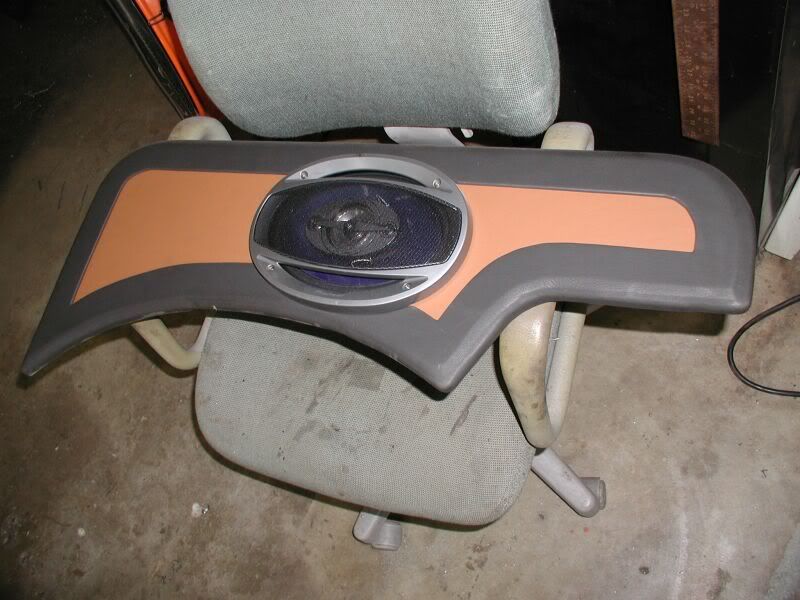
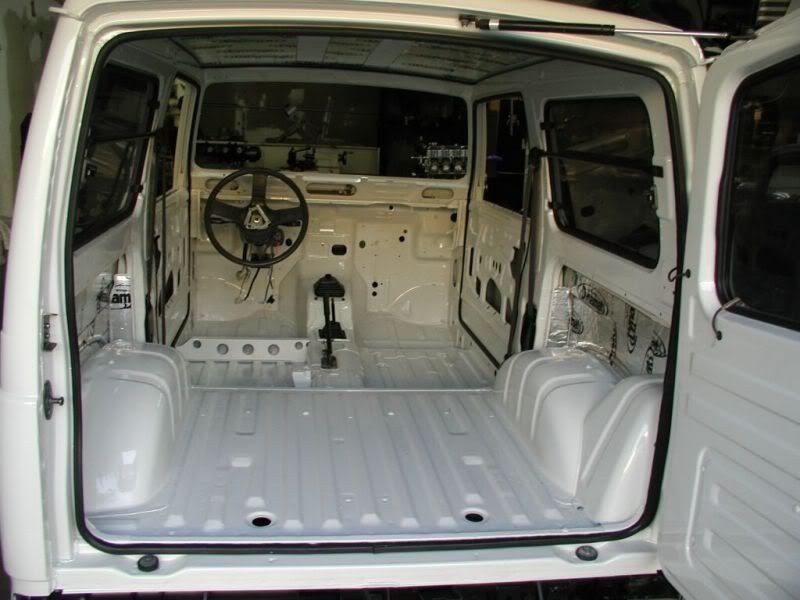
I have a DD TT and it gets BAD road noise and when it rains it sounds like a tin shed. I knew that I was going to address this problem in the new Rig by installing Dynamat.

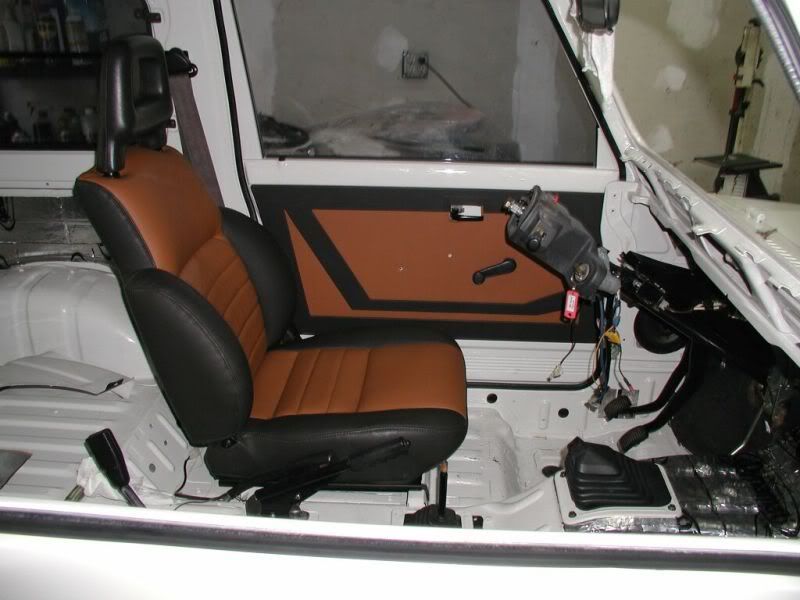
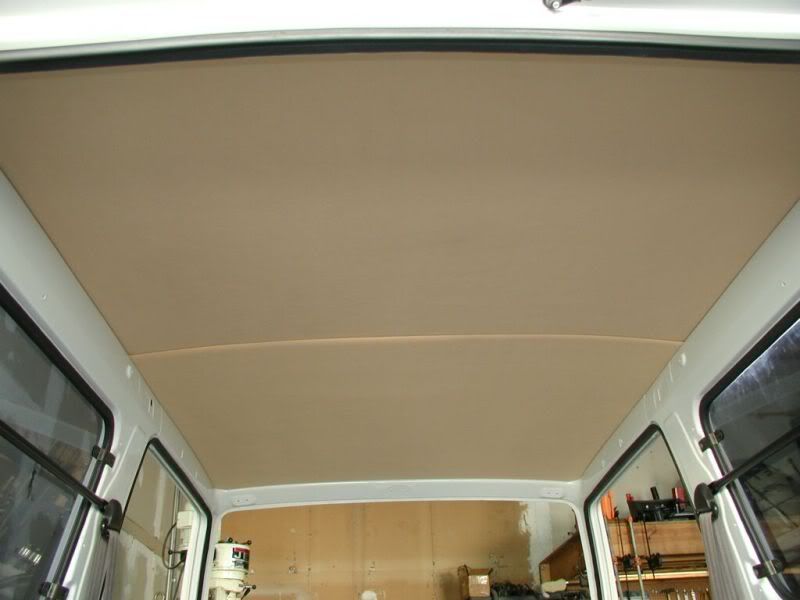
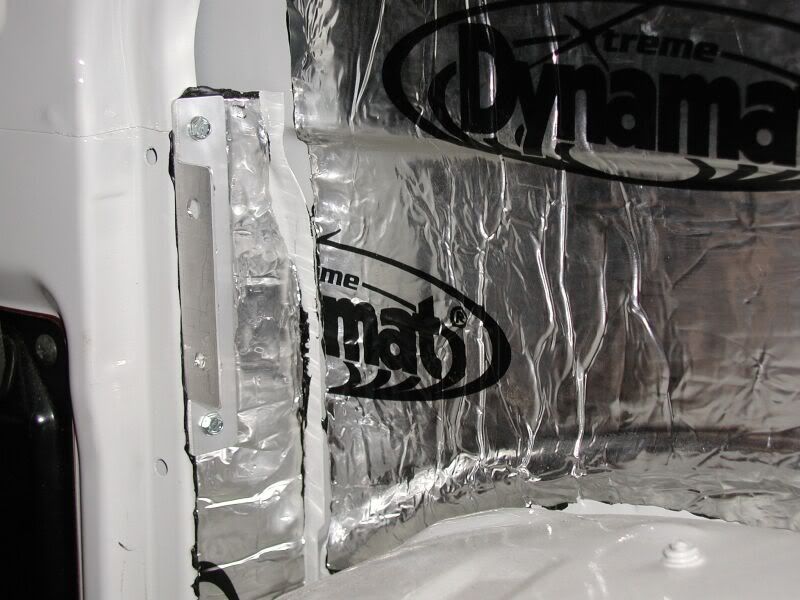
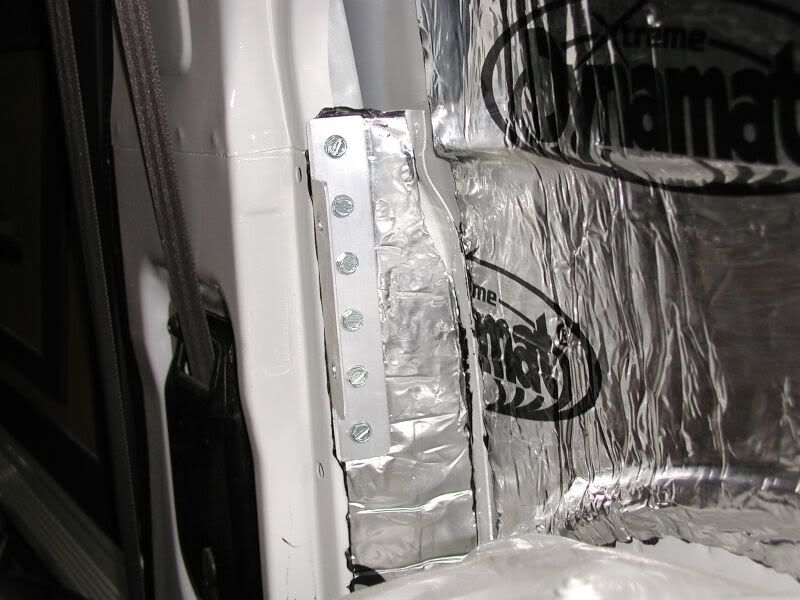
Here are a few pics of the new interior and the Dynamat process. I found by working in smaller pieces and get it pressed down tightly was the better way (JUST MY OPINION).

The firewall front cab and tunnel was a challenge. I also did the inside of the doors and inner panels.

Painted Interior

Image


Roof DynaMat

Image


Driver Side Rear Inner Panel DynaMat

Image


Driver Side Panel & Seat

Image


Headliner

Image


PS Front Panel

Image


Rear Panel

Image


Back Mounting Bracket for Rear Panel (Front View)
Image


Same Back Mounting Bracket for Rear Panel (Side View)

Image

Re: Zuk on 38's

Posted: Fri Feb 24, 2012 12:18 pm
by Tramp
Brilliant, its amazing how much work you have put into this, I am gutted to hear you won't be producing any more of those inlet manifolds it really is fantastic, how about I ship my SJ over then you give my engine the same going over?

Re: Zuk on 38's

Posted: Fri Feb 24, 2012 1:09 pm
by ScottieJ
I think Luke might be getting some interior envy as well :brows:

I'm waiting for the first person to spot and ask about what's hiding off the the side of one of those pictures :rockin: I would love to go down a 1/4 mile in it :brows:

Re: Zuk on 38's

Posted: Fri Feb 24, 2012 2:12 pm
by TanZuk
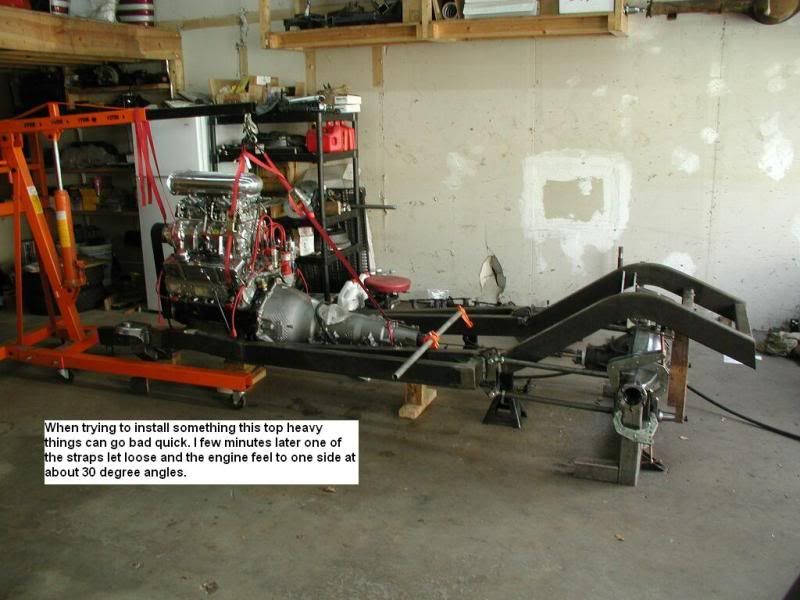
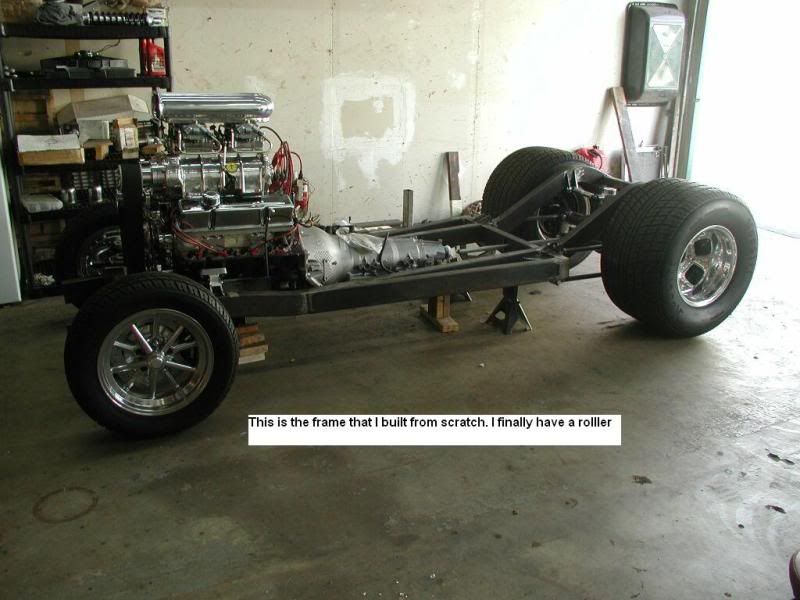
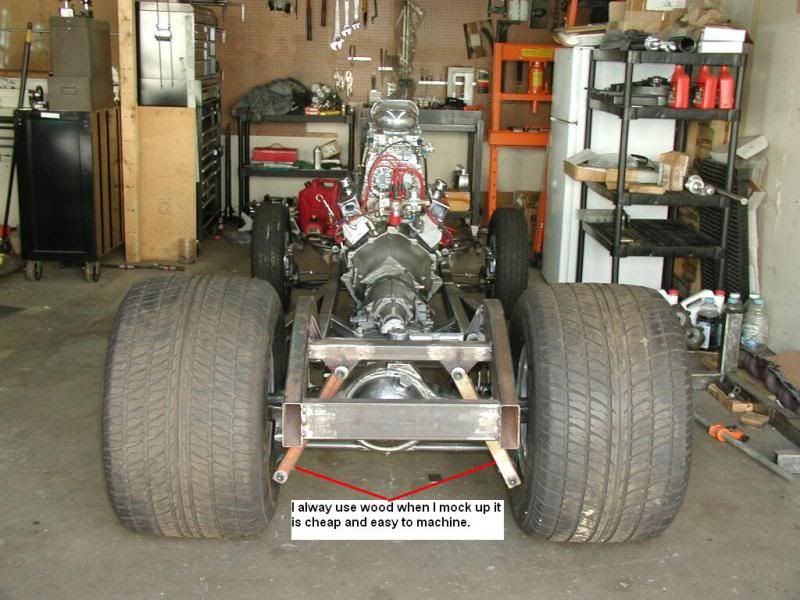
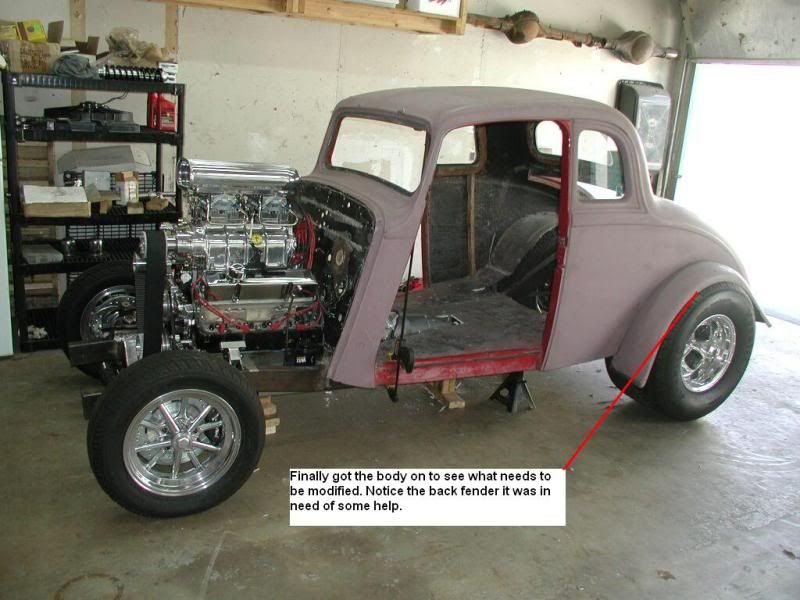
I did say that I would try and answer all questions. I hadn’t planned on posting this because it is not part of the build. This is another Bucket List build that I need to finish.

This is the object that Scott is referring to a ¼” away in the pic.

Stats:

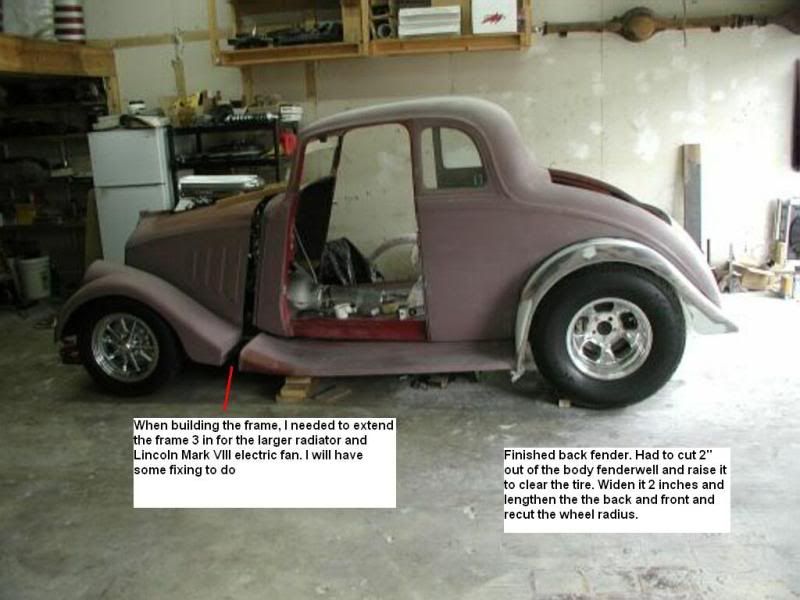
1933 Willys Fiberglass body and I built the frame.

THIS IS MY AVITAR PIC

671 Littlefield setup for 1 to 1 ratio, 383 Chevy STROKER all the high dollar internals, 4L60E auto manual valve body beefed up to hold 1000 hp. 8 3/4 456 gears with a 4 bar suspension, Mustang II front, It has 800HP and is a beast.

Now for the Beast


Image


Image


Image


Image


Image

Re: Zuk on 38's

Posted: Fri Feb 24, 2012 2:14 pm
by TanZuk
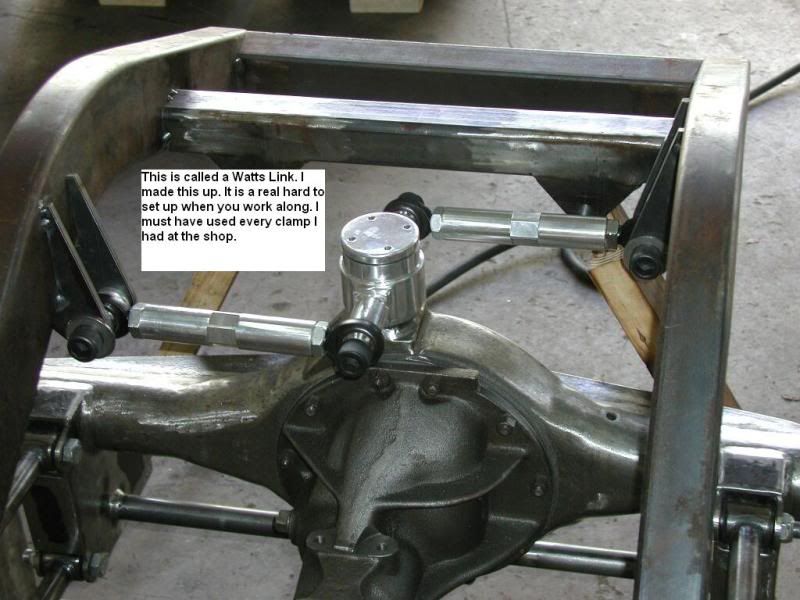
I kept this one separate. It is called a Watts link. I works great for this type of application because it keeps the
rearend centered at all times. There is only 2 inches between the frame rails and the back tires. If I used a panhard
bar it would have been way too short and would have been pushing the rearend from side to side during the
suspension cycling.

It took me a while to get all the info to make this up. It is a few different ideas put into 1. I also have Mustang II front
inner and outer wheel bearings and seal in it and a cap for the top to keep the dirt out and to adjust and grease.

As I said this was a bunch of different ideas put into 1 and sealing everthing off was mine to add. They don't make
anything like this. It is a real chore to get it all set up correctly. I works great.


Image

Re: Zuk on 38's

Posted: Fri Feb 24, 2012 2:59 pm
by Tramp
ScottieJ wrote:I think Luke might be getting some interior envy as well :brows:

No No I'm not...................................

Well a little!!! :bawling: - It puts mine to shame!!!

Re: Zuk on 38's

Posted: Fri Feb 24, 2012 3:11 pm
by Tramp
TanZuk wrote: Stats:

1933 Willys Fiberglass body and I built the frame.

Image


Willys body? I only thought willy's only made the anus, I guess I've learnt something today!

And with that last photo I can see you having problems shutting the hood!!